
Fix Sunken Pavers: Rebuild Base in 4–6 Inch Lifts, When to Call a Pro
- Installed per sq ft
- $18–$35
- Typical 400 sq ft patio (with fire pit)
- $9,000–$14,000
Fix Sunken Pavers: Rebuild Base in 4–6 Inch Lifts, When to Call a Pro
Local, shallow sunken pavers can usually be fixed by removing the units, rebuilding the base in compacted lifts, and resetting the pavers. The repair sequence is remove, inspect the base and drainage, compact aggregate in lifts, screed fresh bedding, then reset and joint the pavers. Deeper settlement, repeated washout in the same spot, or any exposed utility line means it’s time to call a pro instead of digging further.
TL;DR:
- Sunken pavers mainly result from poor base or drainage issues, such as inadequate compaction, trapped water, or loose edge restraints, requiring repair of these layers first.
- Proper repair involves removing pavers, inspecting and fixing drainage and base conditions, rebuilding the base in controlled lifts, and screeding a thin bedding layer before resetting pavers.
- Use specific tools like a plate compactor with 4 to 6 inch lifts and aim for at least 98% Proctor density; skip extra bedding sand over a failed base to prevent future sinking.
- Address failed edge restraints and ensure proper slope and lippage before final compaction and joint refilling, and test surface slope with water to confirm proper drainage.
- For wide, deep, or recurring sinkage, or when utility lines are involved, hiring a professional is recommended, as they can diagnose site-wide issues and provide a lasting fix.
Table of Contents
- Tools and Materials You Need Before You Start
- What’s Actually Causing Your Pavers to Sink?
- The Complete Repair Sequence, Step by Step
- Compaction Specs That Actually Matter
- Getting Edge Restraint and Joints Right
- Keeping Sunken Pavers From Coming Back
- When Should You Call a Professional Instead?
- Why Base Repair Comes First, Every Time
- Prefer to Hand This Off? Here’s How We Help
- Where This Guidance Comes From
- Sources
- FAQ
Tools and Materials You Need Before You Start
Before you pry up a single paver, get everything staged. Running back to the hardware store mid-repair with wet base material sitting exposed is how a Saturday project turns into a Saturday-and-Sunday project.
You’ll want these hand tools and safety items on hand:
- A flat pry bar and a paver puller (or two wide chisels) to lift units without chipping edges
- A rubber mallet and a length of 2x4 wrapped in carpet for resetting pavers without cracking them
- A long level, a screed board, and mason’s string for checking slope
- Work gloves, safety glasses, and knee pads (this job is done at ground level, repeatedly)
- A wheelbarrow and flat shovel for moving spoil and aggregate
On the materials side, stock washed, graded aggregate (not bank-run gravel) for the base, coarse bedding sand, and either polymeric or mason sand for the joints. Keep a few spare pavers on hand in case any crack during removal.
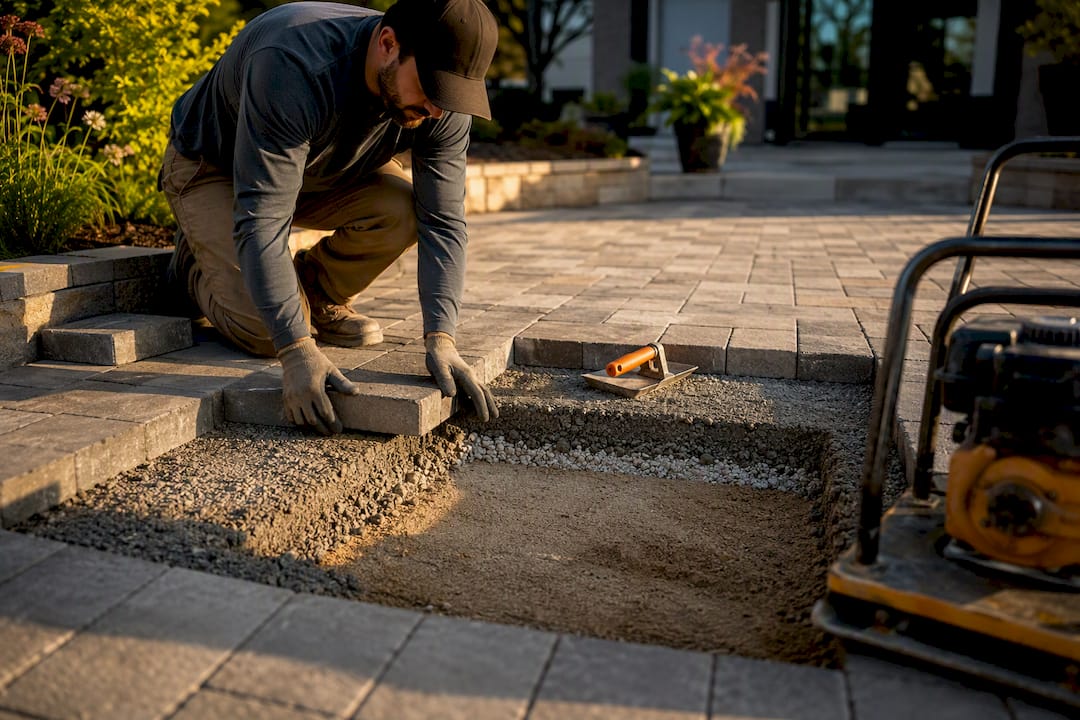
For compaction, a walk-behind plate compactor is the standard tool for residential repairs. Rental units generally run in the 3,000 to 5,000 pound centrifugal force range, which is enough for base and bedding work on patios and walkways. If you’re rebuilding a driveway section that carries vehicle loads, ask the rental counter for a reversible plate compactor with higher force output.
Before any digging, call 811 or your local utility-locate service. It’s free, and it’s the only way to know for certain whether a sprinkler line, low-voltage cable, or gas line sits under that sunken spot. If your patio sits inside an HOA or the sunken area touches a public sidewalk or drainage easement, check whether a permit applies before you start.
Pro Tip: Buy 10 to 15% more aggregate and bedding sand than your calculated volume. Compaction always eats more material than the math suggests, and a mid-project supply run wastes an afternoon.
What’s Actually Causing Your Pavers to Sink?
Sunken pavers almost always point to something failing underneath the surface, not a problem with the pavers themselves. According to CMHA technical guidance, depressions usually trace back to inadequate subgrade or base compaction, water trapped in the soil or base layer, washed-out bedding or joint sand, or edge restraints that have loosened and let the whole field spread. Fix those underlying layers before you touch the surface sand.
Work through this checklist before you remove a single unit:
- Look for ponding. Water sitting on the surface after rain, rather than running off, tells you the original grade has been lost.
- Check the spread pattern. A single depressed unit usually means a local void. A dish-shaped low spot spanning several feet usually means the base has settled or washed out over a wider area.
- Rock each paver by hand. A paver that wobbles or clicks when you step on it has lost bedding contact underneath, even if it looks level.
- Measure lippage. Run your hand across adjoining paver edges. Anything over about 1/8 inch of height difference between neighboring units is worth documenting and addressing.
- Trace the depth and footprint. Small, shallow dips a few inches across and under an inch deep are reasonable DIY territory. A depression wider than a few feet, deeper than an inch or two, or one that keeps coming back after a fix, points to a bigger base or drainage problem.
- Inspect edge restraints. Loose, cracked, or missing plastic or aluminum edging lets the whole field creep outward, which shows up as sinking in the middle.
- Look uphill and downhill. A downspout dumping water two feet from the patio, a sprinkler head aimed at the same spot every cycle, or a tree root pushing up nearby are common root causes worth ruling in or out.
Before you disturb anything, photograph the entire area and the specific pattern of pavers. Extension guidance and manufacturer literature both stress documenting the layout before removal, since reinstating a herringbone or basket-weave pattern from memory rarely goes well.
The Complete Repair Sequence, Step by Step
This is the core of a sunken paver repair, and skipping steps here is exactly why so many DIY fixes settle again within a year. Do them in order.
1. Document and mark the area
Photograph the depression from directly overhead and from the side, so you can see both the pattern and the depth of the dip. Snap a chalk or pencil mark on the back of each paver you’re about to remove, noting its row and position. This single step is what makes reassembly fast instead of a frustrating puzzle.
2. Remove the pavers carefully
Work from the edge of the affected area inward, using the pry bar to lift the first unit and your hands for the rest. Stack pavers in the order you pulled them, ideally on a tarp nearby, sorted by course. If the settlement runs along or crosses a utility repair trench, CMHA reinstatement guidance recommends pulling up roughly 18 inches of pavers on each side of the opening, not just the units directly over it, so the surrounding pattern reinstates cleanly.
3. Remove and inspect the old bedding sand
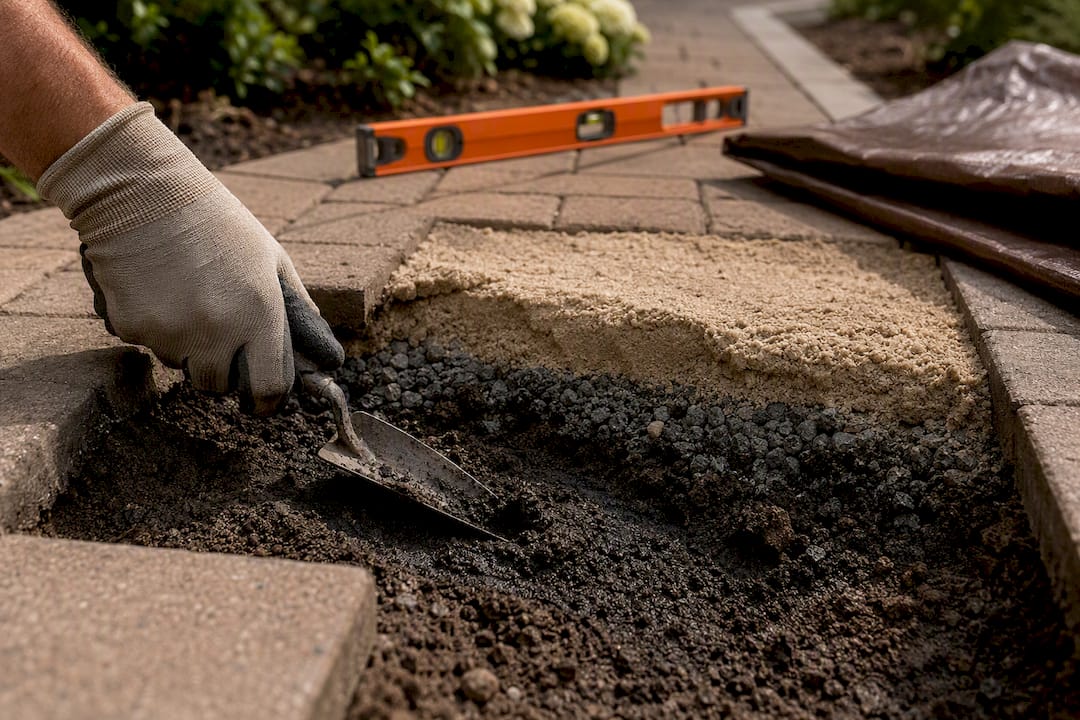
Scrape out the bedding sand down to the base layer. This is where the real diagnosis happens. Look for standing water, dark saturated soil, or a soft, spongy base that gives under a shovel. Any of those signs mean the problem is drainage or compaction, not just settled sand.
4. Fix drainage and edge restraint before you rebuild anything
This step gets skipped constantly, and it’s the single biggest reason repairs fail again within a season. If water has been pooling or draining toward the area, correct the grade of the subgrade soil before adding new base material. Confirm the edge restraint is intact, properly staked, and pulling the field together; replace any cracked or loose sections now, while the area is open.
5. Rebuild the base in controlled lifts
Add graded aggregate back in thin layers rather than dumping the whole depth at once. CMHA construction guidance calls for 4 to 6 inch lifts with proper compaction between each one. Run the plate compactor over each lift before adding the next, working from the outside edges toward the center. For a typical residential patio or walkway, that means building back up to roughly the same 5 inches of compacted base that extension guidance for installing concrete pavers describes for a standard section.
6. Screed the bedding sand
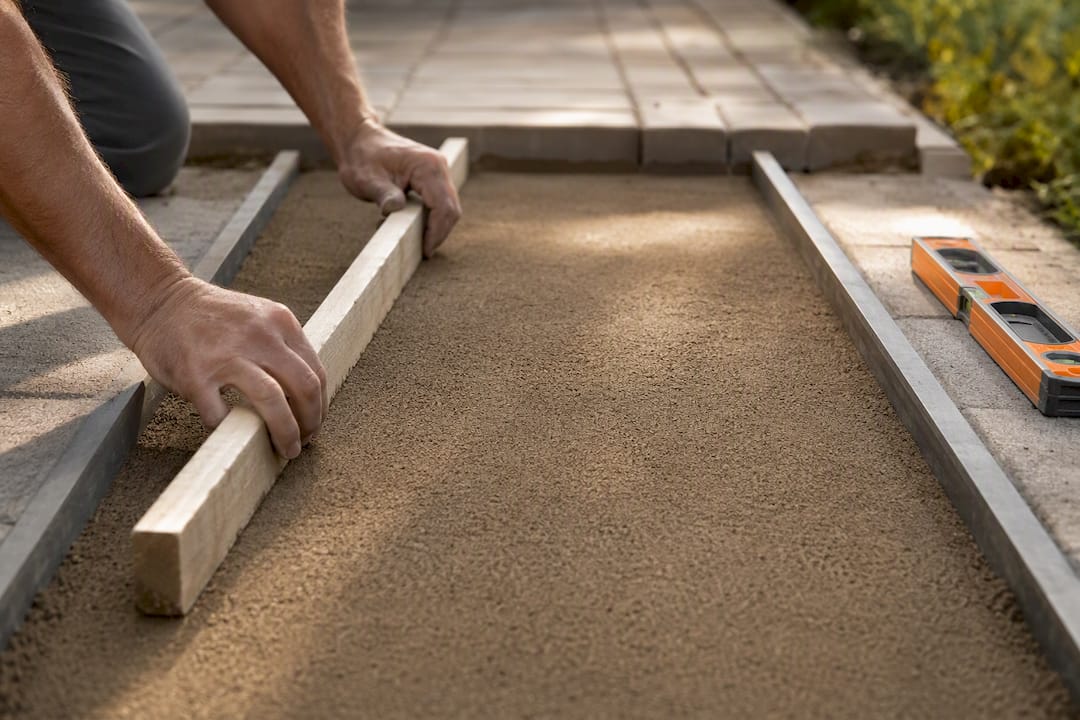
Once the base is compacted and level, add bedding sand and screed it flat using your screed board riding on temporary rails. Keep this layer thin. Iowa State’s guidance points to about 1½ inches as a representative bedding depth. A thicker sand bed feels like an easy fix for an uneven base, but it isn’t. It just delays the same settlement.
7. Reset the pavers and compact
Place the pavers back in their documented pattern, tapping each one level with the rubber mallet over the carpet-wrapped 2x4. Once the whole section is set, run the plate compactor over the surface two or three passes to seat the units into the bedding sand.
8. Refill the joints
Sweep joint sand into the gaps between pavers, then run the compactor once more to work the sand down. If you’re using polymeric sand, follow the manufacturer’s activation instructions for misting water over it.
9. Final check: slope and lippage
Set your level across the repaired section and confirm water will run away from any structure. A common rule of thumb for surface grading, drawn from site drainage guidance, is about a 1 inch drop for every 4 feet of run. Run your hand across every joint one more time to catch any lippage before calling the job done.
Pro Tip: Do a “rain test” with a garden hose before you refill the joints completely. If water still pools anywhere in the repaired section, fix the grade now, not after the joint sand sets.
Compaction Specs That Actually Matter
Compaction is where most DIY sunken paver repairs succeed or quietly fail six months later. Get this part right and the rest of the job holds.
The core rule is thin lifts, repeated compaction. Adding 8 or 10 inches of aggregate and compacting it once looks finished, but the bottom of that layer never actually densifies. CMHA’s lift and compaction guidance specifies 4 to 6 inch lifts, each compacted before the next goes down, and recommends reducing lift thickness further when you’re working with lighter rental equipment near edges, drains, or utility lines where full compactor force isn’t practical.
For pedestrian patios, walkways, and residential driveways, CMHA’s target is at least 98% standard Proctor density; vehicular areas generally call for 98% modified Proctor density. You won’t have a density gauge in your garage, but the practical takeaway holds: more passes with a smaller compactor near obstacles beats fewer passes with a bigger one that can’t reach the same spot safely.
A few habits separate a repair that lasts from one that doesn’t; for example, following a detailed walkway pressure washing process helps maintain and preserve the walkway’s condition before you start repairs.
- Never compensate for a soft base by piling on extra bedding sand. It buys you a few months, not a fix.
- Skip stone dust or unwashed screenings as a base substitute. Use graded aggregate that drains, not fines that hold water.
- Don’t run the compactor directly over the paver joints during bedding compaction; compact the base and bedding layers before the final paver-surface pass.
- Work compactor passes in overlapping rows, not random patterns, so you don’t leave gaps in coverage.
Compaction guideline snapshot: CMHA recommends 4 to 6 inch lifts for base aggregate, with each lift compacted before adding the next, and a minimum of 98% standard Proctor density for pedestrian and residential driveway areas.
Getting Edge Restraint and Joints Right
An edge restraint that has failed is often the real reason a paver field keeps sinking in the middle, even after you’ve rebuilt the base. Without something holding the perimeter, every freeze-thaw cycle and every footstep nudges the units a little farther apart, and the field slowly collapses inward.
- Rigid plastic or aluminum edging, staked every 12 inches or so, is the standard for residential patios and walkways; replace any section that’s cracked, bent, or pulled loose from its stakes.
- Concrete or mortared edge units need to be checked for cracking or separation from the base; a hairline crack today is a shifted border in a year.
- Before final compaction, pull adjacent courses back together using a rubber mallet and a block of scrap wood as a buffer, closing any gaps that opened when the field spread.
- Dry-fit replacement pavers against their neighbors before setting them permanently; a paver that’s even a quarter inch off pattern creates a lippage point that gets worse under traffic.
- For joint fill, polymeric sand resists washout and weed growth better than plain mason sand, though it requires careful water activation per the product instructions.
- Check every joint by hand for lippage before you run the final compaction pass. Fixing it after compaction means starting the reset over.
Restoring the edge restraint properly is what keeps this from becoming a recurring repair instead of a one-time fix.
Keeping Sunken Pavers From Coming Back
A repaired patio can sink again within a year if nobody keeps an eye on it. The good news is that ongoing maintenance takes minutes, not weekends.
- Walk the patio after every heavy storm. Look for new ponding, shifted pavers, or washed-out joint sand near downspouts and low corners.
- Sweep or vacuum joints twice a year and top up joint sand wherever it’s visibly low, especially along high-traffic paths.
- Skip the power washer on joints. Extension guidance notes that power washing pavers tends to blast joint sand out along with the dirt, undoing the exact stabilization you just installed. A soft-bristle broom and a garden hose handle most cleaning without the risk.
- Reseal on the manufacturer’s recommended cycle, not sooner, since over-sealing can trap moisture under the surface instead of shedding it.
- Keep gutters and downspouts clear and pointed away from the patio; a single clogged gutter dumping water onto one corner is a common repeat cause of localized sinking.
- Run a spring and fall check on grade and joints, matching your seasonal freeze-thaw cycle, and catch small dips before they become weekend projects again.
For a fuller maintenance rhythm, our guide on paver patio maintenance walks through a seasonal schedule in more detail, and our piece on patio slope drainage covers the grading side in depth.
When Should You Call a Professional Instead?
Some sunken paver situations are past the point where a weekend and a rental compactor solve the problem safely.
- The depression is wide or deep. Settlement spanning several feet, or dropping more than an inch or two, usually signals a base or soil problem bigger than a local repair.
- It keeps coming back. If the same spot has sunk twice after a proper fix, something structural (soil composition, a hidden drainage path, an old tree root system) is driving it.
- You’ve hit a utility line, pipe, or unstable soil during removal. Stop and call a professional rather than continuing to dig.
- Multiple areas are sinking at once, which often points to a site-wide drainage or grading issue rather than isolated bedding failure.
Before a contractor visit, gather your photos of the depression, measurements of its size and depth, and notes on any prior repairs or nearby drainage issues (downspouts, sprinkler heads, grade changes). A professional will typically evaluate base depth and compaction, drainage correction needs, and edge restraint condition, then quote a repair scope around those findings. Ask specifically about lift thickness, compaction method, and whether the work carries a workmanship guarantee. Vague answers on any of those three are a warning sign.
Why Base Repair Comes First, Every Time
The instinct with a sunken paver is to lift it, throw in more sand, and drop it back down. It looks fixed for a season. Then it sinks again, usually worse, because the sand never addressed what actually failed underneath.
Our approach on every paver patio repair starts the same way: diagnose the base and drainage first, then decide what the surface needs. That order matters more than the brand of paver or the pattern you choose. A field of premium pavers set on a soggy, undercompacted base will sink just as reliably as a budget product, and often faster. We’ve seen driveways and walkways where a single misdirected downspout caused more damage over two years than the original installation ever should have allowed.
Reused pavers, properly labeled and reset, perform just as well as new ones when the base underneath is done right. That’s part of why documenting the pattern before removal matters so much. It’s not busywork. It’s what makes a repair instead of a patch.
— GC Signature Outdoors LLC
Prefer to Hand This Off? Here’s How We Help
If you’ve read this far and decided the base rebuild, the lift-by-lift compaction, and the pattern reassembly are more than you want to take on this weekend, that’s a reasonable call. Professionals experienced in building and repairing paver patios and walkways in the KC Northland area handle the base and drainage diagnosis first, exactly the way this guide recommends, before touching a single paver.

We price paver patio work, including repairs, at $18 to $35 per square foot, depending on the scope of base rebuild and drainage correction needed. If the sinking is tied to a larger grading problem, our design-build team also handles concrete flatwork and drainage corrections as part of a broader outdoor living project. The same crew handles every part of the job, so you’re not coordinating between separate excavation, drainage, and paving contractors.
The next step is simple: request a site visit, and we’ll walk the affected area, diagnose whether the fix is local or systemic, and give you a written scope before any work starts.
Where This Guidance Comes From
The repair sequence, lift thickness, and compaction targets in this guide follow CMHA’s technical resource series on paver reinstatement and construction, alongside university extension installation guidance from Iowa State. Both shaped the bedding depth, lift, and drainage recommendations above.
Sources
- CMHA technical guidance (PAV-TEC series)
- Installing Concrete Pavers, Part Two | Iowa State University Extension
- Site grading and drainage guidance (Oregon State example)
FAQ
How much does it cost to repair sunken pavers?
Costs vary widely depending on the size of the sunken area, base rebuild depth, and whether drainage correction is needed. GC Signature Outdoors LLC prices paver patio work, including repairs, at $18 to $35 per square foot; a small, shallow DIY repair mainly costs the price of aggregate, sand, and a compactor rental.
How can I fix sunken paving slabs?
Remove the affected pavers, dig out the old bedding sand down to the base, and inspect for drainage or compaction problems. Rebuild the base in 4 to 6 inch compacted lifts per CMHA guidance, screed a thin bedding sand layer, then reset the pavers and refill the joints.
What causes sunken pavers?
Sunken pavers usually come from inadequate base compaction, water trapped under the surface, washed-out bedding or joint sand, or a failed edge restraint that lets the field spread, according to CMHA technical guidance. Tree roots and heavy vehicle loads on a patio-rated base are also common contributors.
How do I know if I should DIY the repair or hire a pro?
Small, shallow depressions a few inches across and under an inch deep are reasonable for a motivated homeowner with a weekend and a rented plate compactor. Wide or deep settlement, repeated sinking in the same spot, or any exposed utility line during removal means it’s time to bring in a professional.
Can I just add more sand instead of rebuilding the base?
No. Piling extra bedding sand on top of a failed base masks the problem temporarily but doesn’t fix it, and the area typically sinks again within months. Both Iowa State’s installation guidance and CMHA technical notes call for rebuilding the compacted aggregate base rather than deepening the sand layer.
Recommended
Ready to get started in Kansas City's Northland?
GC Signature Outdoors serves Smithville, Platte City, Kearney, Liberty, and surrounding areas.