
Which Paver Patterns Actually Work for Your Project?
- Installed per sq ft
- $18–$35
- Typical 400 sq ft patio (with fire pit)
- $9,000–$14,000
Which Paver Patterns Actually Work for Your Project?
Herringbone wins for driveways because its interlocking geometry resists the lateral push of tires braking and turning. For patios, ashlar or running bond with a border gives you the best mix of looks and buildability. Walkways do best with simple running bond, and small courtyards shine with basketweave or a tight 45° herringbone. None of that matters much if the base underneath is wrong. A compacted gravel foundation, solid edge restraint, and correct drainage slope determine whether any pattern survives its first winter.
This guide covers:
- A visual rundown of the most common paver laying patterns and what each one is good for
- How to match a pattern to a driveway, patio, walkway, or pool deck
- What complexity really costs you in labor and cutting time
- Layout tactics that make a pattern read cleanly once it’s on the ground
- The foundation work that decides whether your patio lasts five years or twenty five
TL;DR:
- Herringbone is the best pattern for driveways because its interlocking geometry withstands tire shear forces effectively.
- Running bond or ashlar patterns are ideal for patios and walkways due to easier installation and visual appeal, while complex patterns increase labor by up to 30 percent.
- A proper foundation with a compacted gravel base, correct bedding sand depth, and rigid edge restraints is crucial for the longevity of any paver surface.
- Borders, especially using contrasting colors and a soldier course, improve appearance without much extra effort or material costs.
- Hiring a professional for complex patterns and base prep ensures the patio lasts longer and meets structural requirements, especially in vehicular areas.
Table of Contents
- Paver Pattern Ideas: A Quick Gallery of the Classics
- Which Paver Pattern Fits Your Project?
- How Much Harder Is a Complex Pattern to Install?
- Planning Your Layout Before You Lay a Single Paver
- What Base and Drainage Specs Does Every Pattern Need?
- Finishing Touches: Color, Borders, and Sealing
- What We Tell Clients Before They Pick a Pattern
- Prefer a Built, Guaranteed Result Over a DIY Weekend?
- Key Takeaways
- Sources
- FAQ
Paver Pattern Ideas: A Quick Gallery of the Classics
Every paver design idea on this list traces back to brick masonry, and most were solving a structural problem long before they became decorative. Here’s a rundown of the patterns you’ll actually run into while planning a project.
- Herringbone (45° or 90°). Pavers lay at right angles to each other in a zigzag. The interlock is mechanical, not just visual. Industry technical guidance on heavy vehicular traffic identifies herringbone as the layout that best distributes lateral loads across the field, which is why it’s the default for driveways and anywhere cars turn or brake.
- Running bond (stretcher bond). Every row offsets by half a paver, like standard brickwork. It’s the fastest pattern to lay, reads clean and directional, and suits walkways and large patios where you want the eye to travel.
- Basketweave. Pairs of pavers alternate direction to form little woven squares. It needs pavers in a 2:1 ratio (a 4x8 stone paired with two 4x4s, for instance) and looks best in small, contained fields rather than sprawling driveways.
- Ashlar, random, or modular patterns. Mixed paver sizes combine in a repeating, non-uniform grid. It mimics natural stone and hides minor sizing inconsistencies well. Manufacturer kits pre-calculate the repeat, which saves you from guessing layout math on the fly.
- Stack bond. Pavers align in a strict grid with no offset. It’s the most modern-looking option and the weakest structurally, since there’s no interlock between joints. Keep it decorative: courtyards, garden paths, accent bands.
- Five-stone, muster, and I-patterns. These modular layouts group a fixed number of paver shapes into a repeating unit, then tile that unit across the field. They’re popular because the repeat unit is predictable, which keeps waste low.
- Circular and radius kits. Pre-cut, wedge-shaped pavers form rings around a fire pit or as a standalone medallion. Manufacturer radius kits exist specifically so DIYers don’t have to hand-cut curved pieces.
Pro Tip: If you’re new to laying pavers, start with a pattern that has a manufacturer kit behind it. Kits are engineered to repeat with almost zero waste, so you skip the trial-and-error math that trips up most first-timers.
Which Paver Pattern Fits Your Project?
Loading and scale should drive your choice before style does. A pattern that looks stunning on a Pinterest board can fail fast if it’s not suited to what’s driving, walking, or sitting on top of it.
- Driveways: Herringbone is the standard for one simple reason, its interlocking geometry resists the shear force of tires turning and braking. A 45° orientation gives a more dynamic look but requires more edge cuts; 90° is simpler to lay and wastes less material along straight borders.
- Patios: Ashlar or random patterns balance visual interest against labor, especially in large fields where a busy pattern like basketweave would look chaotic. Running bond with a soldier course border is the budget-friendly alternative that still reads intentional.
- Walkways: Running bond (stretcher bond) keeps the eye moving forward, which is exactly what you want on a path. It’s also the fastest pattern to install on a narrow footprint.
- Pool decks: Prioritize texture over pattern complexity here. A slip-resistant surface and wider joints for drainage matter more than which pattern you choose, and pool-adjacent patio guidance generally recommends against high-gloss sealed finishes near water.
Pro Tip: Running the long axis of a running bond pattern away from your house, rather than parallel to it, makes a shallow patio feel noticeably deeper.
How Much Harder Is a Complex Pattern to Install?
Pattern choice changes your timeline more than most people expect. Running bond is the fastest layout because it has the fewest required cuts and no sorting by size or ratio. Herringbone typically adds 15 to 30 percent more labor than running bond, and the 45° version costs the most of all because every edge along the border needs an angled cut.
- Paver size and shape ratio determine waste. Basketweave’s 2:1 requirement means you’re managing two SKUs instead of one, which slows sorting.
- Kits with a fixed repeat unit (ashlar, five-stone) cut layout guesswork dramatically compared to freehand random patterns.
- A soldier course border around a herringbone or basketweave field absorbs most of the awkward partial cuts, so the field itself stays clean.
- If you’re facing more than a few dozen angle cuts, renting a wet saw for the day usually pays for itself in saved time and fewer wasted pavers.
Once a project needs a rented saw, a rented plate compactor, and a full weekend of cutting, it’s worth pricing out a professional install against your own time.
Planning Your Layout Before You Lay a Single Paver
Getting a pattern to read correctly on the ground starts on paper, not with the first paver.
- Match scale to space. A pattern with a large repeat unit, like a bold ashlar mix, overwhelms a small courtyard. Save the larger, showier patterns for bigger fields and keep tight spaces to basketweave or fine herringbone.
- Frame the field with a soldier course. A single border row of pavers set perpendicular to the field hides most of your ragged edge cuts and gives the whole installation a finished look for very little extra material.
- Plan curves before you dig. Either use a manufacturer radius kit or set string lines from a fixed center point, measuring offsets every few feet to mark the arc with spray paint before you excavate.
- Stage your materials. Sort pavers by color and size ahead of time, dry lay a few rows to check the pattern before committing to sand, and use spacers or a plywood gauge to keep joint width consistent across the whole field.
Pro Tip: Dry lay at least one full repeat of your pattern on the compacted base before spreading bedding sand. It’s much easier to fix a miscount now than after 200 pavers are set.
What Base and Drainage Specs Does Every Pattern Need?
No pattern survives a bad foundation. This is the part of the project that determines whether your patio looks great for two years or twenty, regardless of whether you chose herringbone or stack bond.
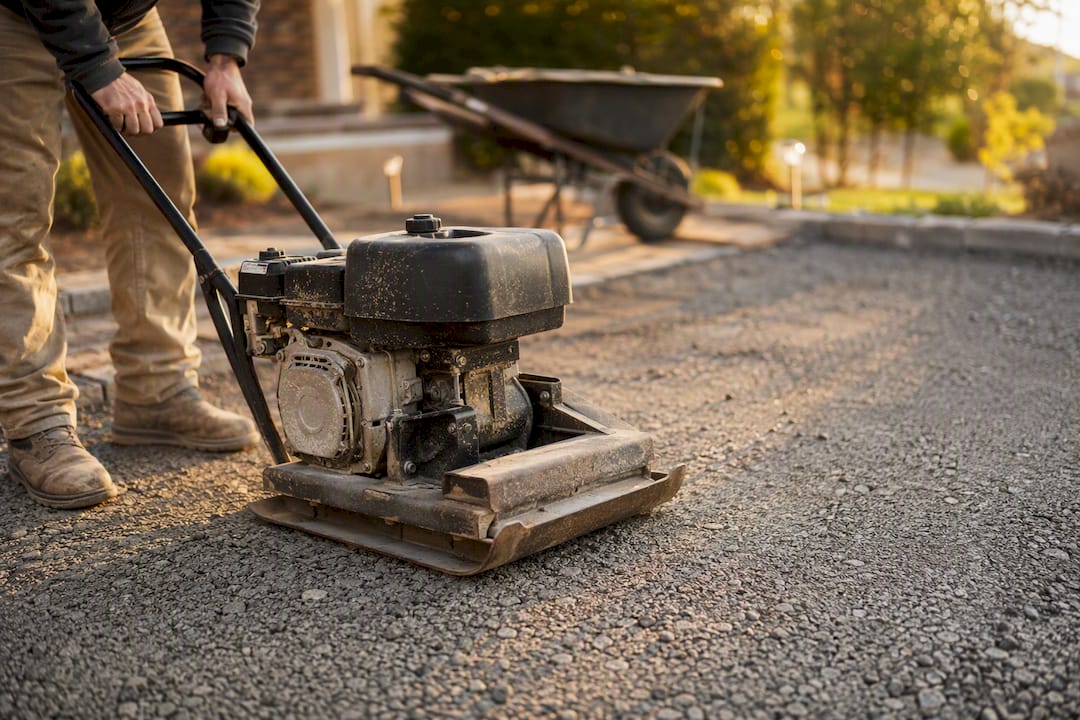
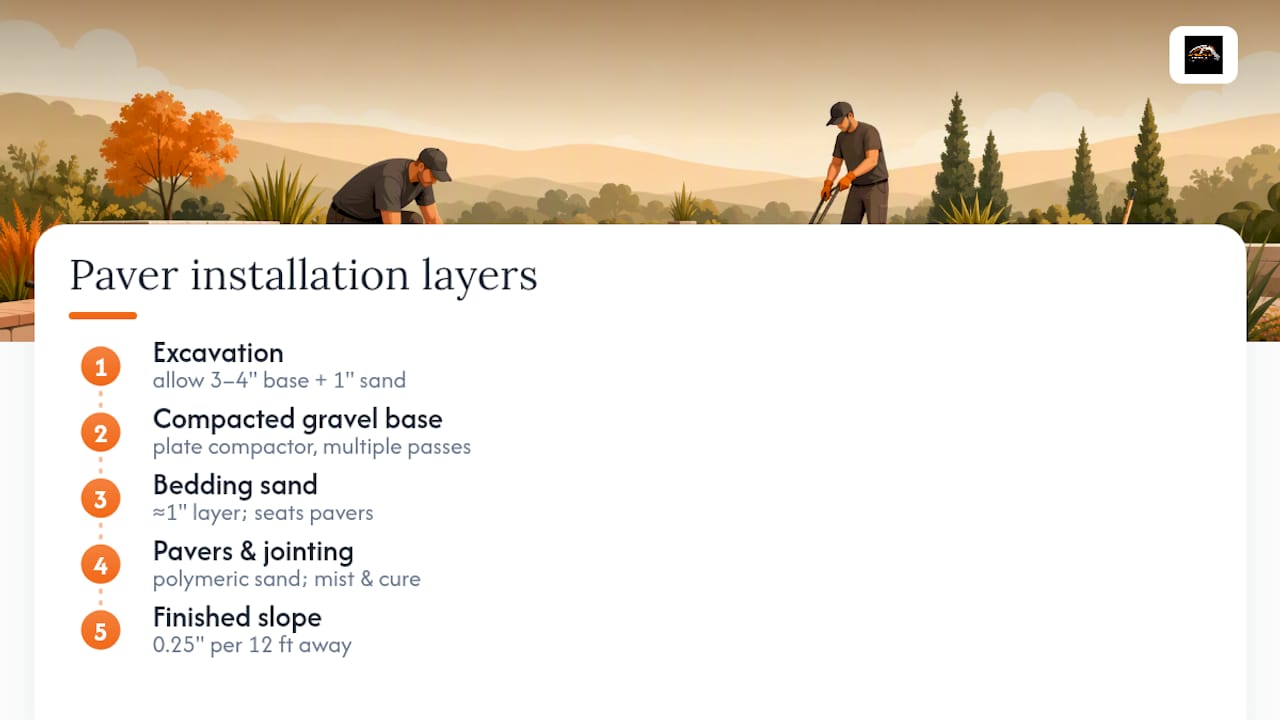
Start by excavating deep enough to accommodate 3 to 4 inches of compacted crushed gravel base, plus about 1 inch of bedding sand on top, adjusting deeper for driveways and other vehicular areas. Skipping proper compaction is one of the most common reasons DIY patios settle unevenly within a season or two. Run a plate compactor over the gravel in multiple passes, then compact again after the pavers are laid, since that final pass locks the whole field together and seats the pavers into the bedding sand.
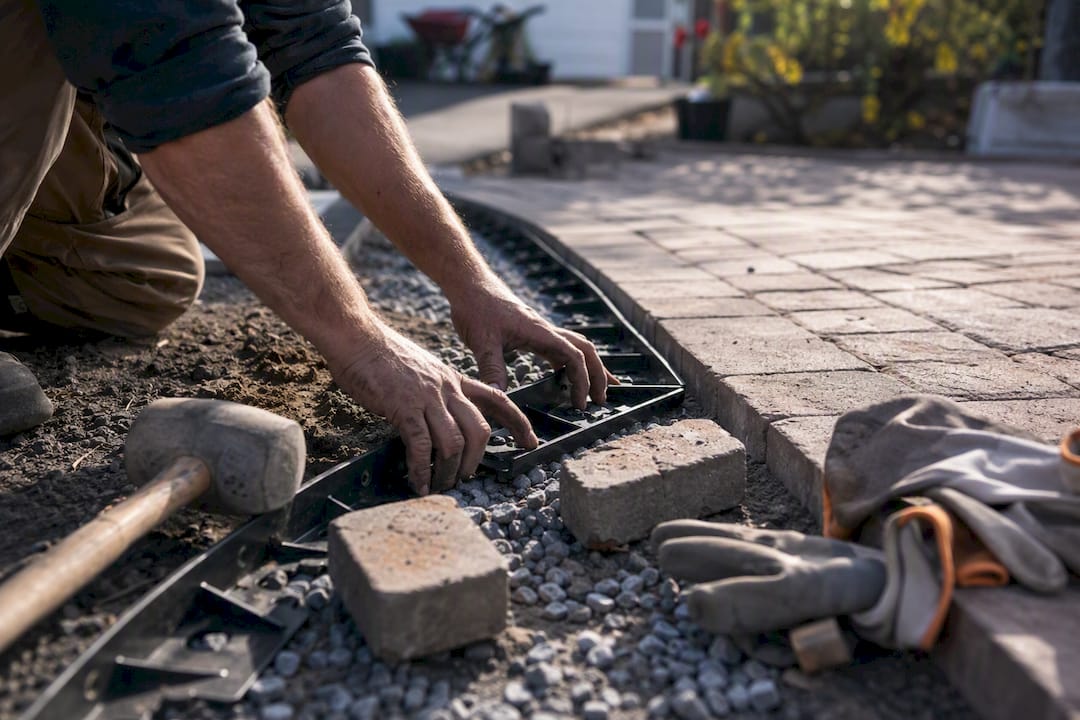
Edge restraints matter more than most homeowners assume, especially in driveways. Without rigid restraint and proper haunching, engineering guidance for heavy-duty vehicular pavement notes that lateral thrust from turning vehicles works pavers loose over time, leading to joint sand loss and eventual surface breakdown. Our own breakdown of paver edge restraint options covers which type fits which application.
Slope the finished surface roughly a quarter inch per 12 feet away from your house or any structure, so water sheds instead of pooling against a foundation. For jointing, polymeric sand locks joints tighter than regular sand and resists weed growth better, but it needs a careful misting and curing sequence right after installation to activate its binding polymers properly.
Finishing Touches: Color, Borders, and Sealing
A well-chosen border does more for perceived quality than a complicated field pattern ever will. Pairing a darker soldier course around a lighter ashlar field, for instance, frames the whole space without adding real installation difficulty.
- Mix paver sizes deliberately in ashlar layouts. Manufacturer kits pre-balance the ratio so the pattern doesn’t accidentally repeat in an obvious grid.
- Use a contrasting border color to define the edge of a patio or walkway, even when the field itself stays simple.
- A small medallion or inset band near an entry point adds a custom feel for relatively little extra labor.
- Seal pavers once the joint sand has fully cured, typically a few weeks after installation, and choose a sealer that matches your desired sheen. Paver sealing guidance notes that sealing also helps joints resist weed intrusion over time.
What We Tell Clients Before They Pick a Pattern
We start every design conversation with use, not looks: what’s parked or walked on this surface, and how much can the budget absorb for base prep? A gorgeous pattern over a shallow, uncompacted base fails regardless of how it photographs on day one. Edge restraint, gravel depth, and slope aren’t negotiable line items for us, they’re the difference between a patio that ages well and one that needs replacing. If you’d rather see finished examples than plan one yourself, our project gallery shows real installs across the KC Northland area.
— GC Signature Outdoors LLC
Prefer a Built, Guaranteed Result Over a DIY Weekend?
Not every homeowner wants to rent a plate compactor and spend a weekend cutting pavers, and that’s exactly where GC Signature Outdoors LLC steps in with an engineered base plan and crew instead of trial and error. We handle paver patios, fire pits, outdoor kitchens, and stone seating areas across Smithville, Platte City, Kearney, and the surrounding KC Northland communities, with the same base prep and edge restraint standards covered above built into every project from the start.

A consultation starts with a site review, where we walk your space, talk through pattern and material options, and map out an engineered base plan suited to your soil and drainage. From there you get a clear scope before any digging starts. If you’re ready to see what a professionally built patio or outdoor living space looks like for your yard, visit our paver patios and outdoor living page to start the conversation.
Key Takeaways
The pattern you choose matters less than the base underneath it, since compaction, edge restraint, and slope determine whether any layout lasts.
| Point | Details |
|---|---|
| Match pattern to use | Herringbone for driveways, ashlar or running bond for patios, running bond for walkways. |
| Foundation decides longevity | Compacted gravel base, correct bedding sand depth, and edge restraints prevent premature failure. |
| Complexity costs time | Herringbone adds 15 to 30 percent more labor than running bond; 45° angles add the most cuts. |
| Borders add value cheaply | A soldier course frames the field and hides ragged edge cuts for minimal extra material. |
| Hire a pro for complex builds | GC Signature Outdoors LLC handles pattern selection, engineered base prep, and edge restraint installation for KC Northland homeowners. |
Sources
- Heavy Vehicular Traffic (technical guidance excerpt)
- How To: Build a Paver Patio — BobVila
- Paver patterns and layouts: what each one costs to install — Alec’s Construction
FAQ
What Is the Best Pattern for Pavers?
It depends on use: herringbone is the strongest choice for driveways and vehicular areas, while running bond or ashlar patterns work best for patios and walkways where looks and ease of installation matter more than load resistance.
Which Paving Pattern Is the Strongest?
Herringbone is the strongest common pattern because its interlocking, angled joints distribute lateral loads across the entire field instead of concentrating stress on individual pavers.
What Are Some Common Patio Paver Design Patterns?
Running bond, basketweave, ashlar or random layouts, and stack bond are the most common patio patterns, each offering a different balance of visual interest and installation labor.
How Do I Lay Out a Paver Patio?
Excavate for a compacted gravel base and bedding sand, dry lay a section of your chosen pattern to confirm the layout, then set pavers with consistent joint spacing before applying jointing sand and a final compaction pass. Homeowners who prefer a guaranteed result can also work with a local design-build team like GC Signature Outdoors LLC for the full engineered install.
Recommended
Ready to get started in Kansas City's Northland?
GC Signature Outdoors serves Smithville, Platte City, Kearney, Liberty, and surrounding areas.