
Homeowners: After 20–30 Years, Replace Your Railroad Tie Wall Safely
Homeowners: After 20–30 Years, Replace Your Railroad Tie Wall Safely
If your railroad tie wall is rotting, leaning, or losing soil behind it, replace it now rather than patch it. Skip repurposing the old creosote-treated ties anywhere on your property. Segmental concrete block, poured concrete, or natural stone with proper drainage will outlast timber by decades. Call a contractor or structural engineer if the wall runs higher than about 3 to 4 feet, sits near a structure, or deals with tricky soil.
TL;DR:
- Railroad tie walls usually last 20 to 30 years and show signs like rot, leaning, or gaps that indicate pending failure, especially in humid climates.
- Removing old creosote-treated ties requires proper hazardous waste handling, including PPE, disposal with local waste authorities, and avoiding burning to prevent PAH release.
- Modern alternatives like concrete block, poured concrete, or natural stone with proper drainage outperform timber and last longer, with drainage being the most critical factor.
- Proper site preparation, including excavation, gravel base, geotextile fabric, and drainage pipe, is essential for the long-term stability of any replacement wall.
- Installations over 3 to 4 feet high often need permits and engineered designs, and hiring experienced professionals is recommended for safety and compliance.
Table of Contents
- How Do You Know a Railroad Tie Wall Needs to Be Replaced?
- Are Old Railroad Ties Dangerous to Remove?
- What Can You Replace Railroad Ties With?
- What Goes Into Site Preparation for a Replacement Wall?
- Should You Hire a Contractor or Handle It Yourself?
- How GC Signature Outdoors Approaches Railroad Tie Wall Replacement
- Step-by-Step: How to Actually Replace a Railroad Tie Wall
- What Tools and Equipment Do You Need?
- How Much Should You Budget for Replacement?
- What Safety Precautions Matter Most During This Project?
- What Homeowners Get Wrong About Railroad Tie Wall Replacement
- Ready to Replace Your Railroad Tie Wall?
- Sources
- FAQ
How Do You Know a Railroad Tie Wall Needs to Be Replaced?
A railroad tie retaining wall gives you plenty of warning before it fails outright, if you know what to look for. Soft, crumbling wood is the clearest sign; press a screwdriver into a tie and if it sinks in easily, the timber has already lost its structural integrity. Gaps between ties wide enough to see daylight through mean the wall is shifting.
Most railroad tie walls last 20 to 30 years before rot sets in seriously, and humid climates with heavy rainfall can shorten that window considerably. Watch for:
- Visible rot, splitting, or fungal growth on the tie faces
- Bowing or leaning, even a few inches out of vertical
- Soil washing out from behind the wall during rainstorms
- Gaps or separation between stacked ties
- Sudden new leaning or cracking near a foundation, patio, or driveway
That last one is not a “get to it this season” problem. If a wall near your house or a walkway suddenly shifts, treat it as urgent and get eyes on it fast, before it takes out a sidewalk or undermines a foundation.
Are Old Railroad Ties Dangerous to Remove?
Railroad ties are treated with creosote, a coal tar derivative loaded with polycyclic aromatic hydrocarbons (PAHs). A study on creosote-treated ties found a distinct pulse of PAH movement into the surrounding soil and ballast during the first hot season after the wood was disturbed, which is exactly what happens when you dig out an old wall in summer.
Handle removal like you would any hazardous material job, not a weekend chore:
- Wear chemical-resistant gloves and eye protection
- Use an N95 mask or better to limit dust and vapor exposure
- Never burn old railroad ties; burning concentrates and releases the PAHs
- Bag or tarp cut sections rather than letting sawdust scatter through garden beds
Pro Tip: Call your local waste management department before you rent a dumpster. Some municipalities accept treated timber as regular construction debris, while others classify it as hazardous waste requiring a specific drop-off site. Getting this wrong can mean a rejected load and a second trip.
Testing on treated crossties has shown leaching behavior varies a lot by tie condition and age, so don’t assume your local rules mirror your neighbor’s experience.
What Can You Replace Railroad Ties With?
New creosote-treated ties are not approved for residential retaining wall replacement in most jurisdictions, so you’re choosing among modern alternatives anyway. Here’s how the main options stack up.
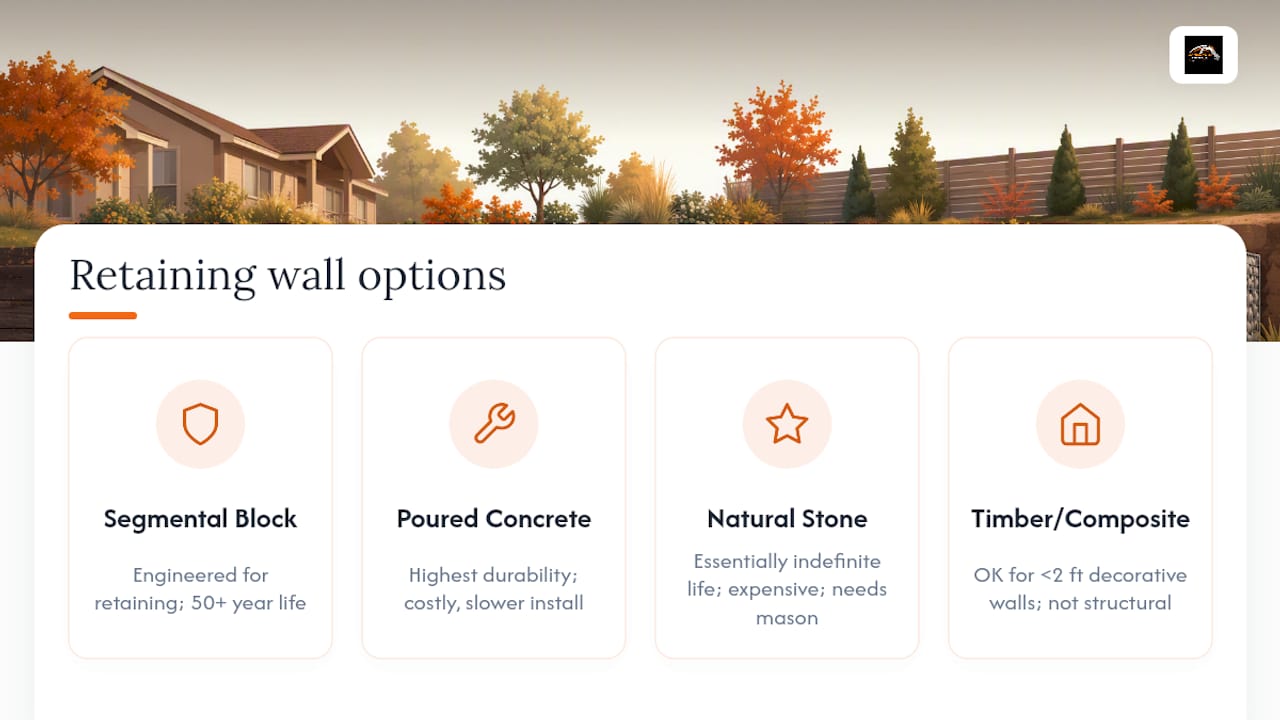
Segmental concrete block systems are engineered specifically for retaining applications. They interlock without mortar, adapt well to curves and slopes, and with proper drainage behind them can last 50 years or more. Installation moves fast compared to poured concrete, and repairs to a single damaged block don’t require tearing out the whole run.
Poured concrete delivers the highest durability of any option, particularly for walls near a foundation, driveway, or anywhere structural loads matter. The tradeoff is cost and process: you need formwork, rebar, and curing time, which pushes both price and project timeline higher than block systems.
Natural stone gives you a look nothing else matches and holds up essentially indefinitely when built correctly. It also costs more in materials and demands a mason who actually knows dry-stack or mortared stone construction. A poorly built stone wall fails faster than a well-built block one, so the labor matters as much as the material here.
Non-creosote timbers or composite sleepers work fine for small, decorative edging, garden borders, or walls under about 2 feet that aren’t holding back real structural load. Once you’re retaining a slope that could slump onto a patio or driveway, timber of any kind is the wrong call.
What Goes Into Site Preparation for a Replacement Wall?
The single biggest reason railroad tie walls fail early is that they were never built on a proper foundation to begin with. Building on top of decayed wood or unprepared soil traps moisture against the new material and guarantees a repeat failure within a few years, no matter how good the blocks or stone are.
A wall built to last follows a specific sequence:
- Excavate down to stable soil and remove every trace of the old ties, including buried sections.
- Compact a crushed-gravel base at least several inches deep to create a stable footing.
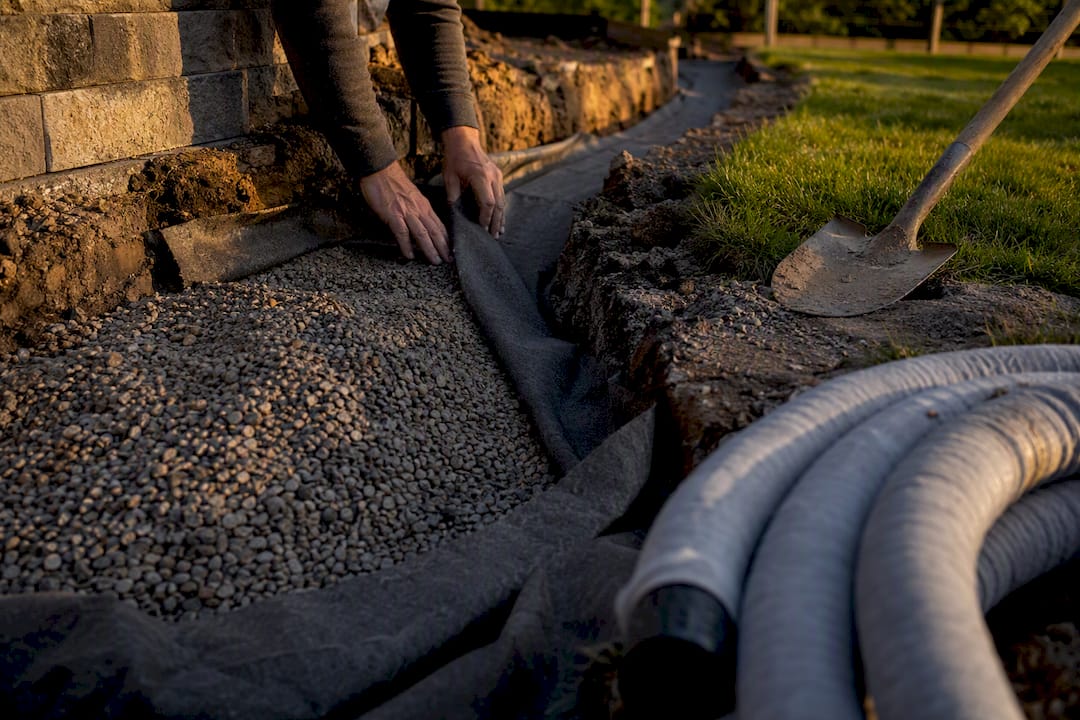
- Line the trench with geotextile fabric to keep soil from migrating into the drainage layer over time.
- Backfill with clean crushed gravel and install a 4-inch perforated drain pipe at the base, sloped to daylight.
- Stack your chosen material in staggered courses, backfilling and compacting in lifts as you go, then finish with caps and any planned landscaping.
That drain pipe is not optional. Hydrostatic pressure, water building up behind a wall with nowhere to go, is one of the leading causes of retaining wall failure, and it’s invisible until the wall is already bowing. Drainage components like French drains, gravel backfill, and geotextile fabric work together, not as substitutes for each other. Skip any one and you’ve built a wall that will eventually fail the same way the old one did.
Should You Hire a Contractor or Handle It Yourself?
Height is the first filter. Once a wall exceeds roughly 3 to 4 feet, most municipalities require a permit, and many require an engineered design stamped by a licensed professional. A permit cost calculator can give you a rough sense of what engineering review and permitting might add to a project before you start pricing contractors. Walls near a foundation, septic system, or underground utilities also belong with a professional, regardless of height.
If you’re interviewing contractors, ask these questions before signing anything:
- Can you show proof of liability insurance and workers’ compensation coverage?
- Do you have references from retaining wall projects, not just general landscaping?
- What’s your drainage plan, specifically, not just “we’ll handle it”?
- How do you dispose of removed creosote ties, and is that documented?
- Will this project need a permit, and do you pull it or do I?
If you’re set on DIY for a smaller wall, budget for a plate compactor rental, proper PPE for the demolition phase, and a truck or dumpster rental sized for how heavy wet, treated timber actually is. Ties run 150 to 200 pounds apiece; moving a dozen of them by hand is a real physical task, not a minor inconvenience.
How GC Signature Outdoors Approaches Railroad Tie Wall Replacement
GC Signature Outdoors LLC builds retaining walls, drainage systems, and full landscape designs for homeowners across the KC Northland area, and railroad tie replacement follows a consistent process. A site visit comes first, to assess soil, slope, drainage conditions, and wall height before recommending a material. Scope includes removing and disposing of the old ties, building an engineered gravel foundation with proper drainage, then constructing and finishing the new wall to match the surrounding landscape. Every project draws on the same professional-grade equipment and materials the company uses across its retaining wall, paver patio, and outdoor living work.
Step-by-Step: How to Actually Replace a Railroad Tie Wall
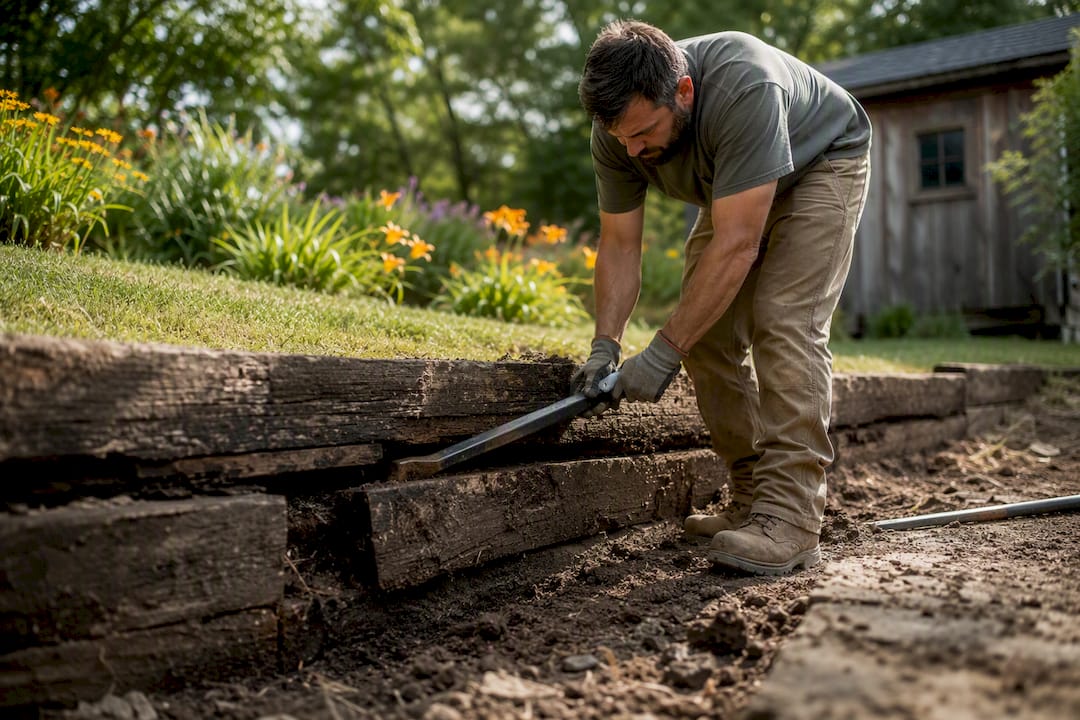
Start by clearing the area of plants, furniture, and anything within a few feet of the wall face, since old ties often extend further back than they appear. Cut ties into manageable sections with a reciprocating saw if they’re too heavy to lift whole. Pry and pull each tie free, working from the top course down, and set them aside for disposal rather than the burn pile or a “reuse it in the garden” pile.
Once the wall is fully removed, excavate the trench to below the frost line in your area, and wider than the old footprint since the new base needs room for gravel and drainage pipe on both sides. Compact the sub-grade with a plate compactor before adding gravel, since skipping this step lets the whole structure settle unevenly within a year or two.
Lay geotextile fabric, then add and compact your crushed-gravel base in 2 to 3 inch lifts. Set the perforated drain pipe at the base, wrapped in fabric to keep it from clogging with fines. Begin stacking your chosen wall material, checking level and setback (the slight backward lean toward the hill) on every course. Backfill with gravel behind the wall as you build, compacting each lift before adding the next. Cap the wall, then restore grading and landscaping in front and behind.
What Tools and Equipment Do You Need?
A wall replacement project pulls from three categories: demolition, construction, and compaction. For demolition, you need a reciprocating saw with demolition blades, a pry bar or wrecking bar, heavy-duty gloves, and a wheelbarrow or dolly rated for the weight of wet timber. A pickup truck or a rented dumpster handles hauling the old ties away.
For the build itself, expect to use a shovel and mattock for excavation, a level (a 4-foot level minimum, ideally a laser level for longer runs), a rubber mallet for setting block or stone, string line and stakes for keeping courses straight, and a masonry saw or angle grinder if you’re cutting block or stone to fit corners and edges.
Compaction equipment matters more than most DIYers expect. A plate compactor, rented by the day from most equipment rental yards, compacts both the gravel base and each backfill lift. Skipping mechanical compaction in favor of hand-tamping is one of the fastest routes to a wall that settles and cracks within its first year. Round out the kit with a wheelbarrow for moving gravel, landscape fabric, and basic safety gear: gloves, eye protection, and steel-toed boots given how much weight is involved.
How Much Should You Budget for Replacement?
Total cost depends on wall height, length, material choice, site access, and whether drainage or grading complications add labor. Segmental block tends to sit at the lower end of the material cost range given faster installation, poured concrete runs higher due to formwork and curing time, and natural stone typically costs the most because of both material price and the skilled labor required to install it correctly.
Beyond materials, factor in disposal fees for the old creosote ties, since some waste facilities charge more for treated timber than standard yard debris. Permit fees apply if your wall height triggers local requirements, and engineering review, when required, adds a separate professional fee on top of construction costs.
For a project-specific number, a written estimate from a contractor who has actually seen your site beats any online cost range. GC Signature Outdoors LLC provides site assessments and written estimates for KC Northland homeowners planning a replacement.
What Safety Precautions Matter Most During This Project?
Demolition and installation carry different risks, and both deserve real attention rather than a quick glance at gloves and glasses. During demolition, the biggest hazards are chemical exposure from creosote dust and the sheer physical weight of the ties themselves. Wear an N95 mask or better, chemical-resistant gloves, and eye protection throughout, and never cut or sand treated wood without dust control.
Back injuries are common on these projects because a single tie can weigh close to 200 pounds when wet. Use proper lifting technique, get a second person for anything you can’t comfortably lift alone, and use a dolly or wheelbarrow rather than dragging pieces across the yard.
During installation, watch trench walls if you’re excavating deep for a taller wall; unsupported soil can collapse without warning. Keep the work area clear of kids and pets while heavy block or stone is being moved and stacked, and never work under a partially built wall or leaning section of the old structure that hasn’t come down yet. If you’re operating a plate compactor, keep loose clothing and cords clear of the moving plate, and wear hearing protection since these machines run loud for extended periods.
What Homeowners Get Wrong About Railroad Tie Wall Replacement
Most homeowners treat this as a cosmetic decision: does the new wall look better than the rotting one? The more useful question is whether the old wall was ever built correctly in the first place. A lot of railroad tie walls installed decades ago went in without any gravel base, drainage pipe, or geotextile fabric, because that wasn’t standard practice at the time. Replacing the ties with block or stone but skipping proper drainage just delays the same failure by a few years.
The creosote question also gets underplayed. Homeowners often assume old ties are fine to reuse as garden borders or firewood once they’re pulled from a wall. Neither is a good idea, and the research on PAH migration backs that up. The environmental risk isn’t dramatic, but it’s real, and it’s avoidable with basic precautions during removal and disposal.
If there’s one priority to take from all of this, it’s drainage first, material second. A mediocre material with excellent drainage will outlast a premium material sitting in standing water behind it every time.
— GC Signature Outdoors LLC
Ready to Replace Your Railroad Tie Wall?
GC Signature Outdoors LLC handles the entire process, from tearing out and disposing of old creosote ties to building an engineered gravel foundation, installing proper drainage, and constructing your new wall in concrete block, stone, or another lasting material. You get one crew managing removal, permitting questions, drainage, and finish work, instead of coordinating a demolition company, a hauler, and a mason separately.

Every project starts with a site visit and a written estimate based on your actual slope, soil, and wall height, not a generic price pulled from a chart. Browse examples of completed retaining wall and landscape work in the project gallery, or reach out through the retaining wall design and build page to schedule an assessment for your KC Northland property.
Sources
- City of Portland residential permitting — retaining wall guidance
- USDA Forest Service — study on PAH migration from creosote-treated railroad ties
- ERWalls — Railroad tie retaining wall replacement FAQs
FAQ
How much does it cost to replace a railroad tie retaining wall?
Cost varies by wall height, length, chosen material, and site access, with segmental block generally costing less than poured concrete or natural stone. A written estimate based on a site visit gives you an accurate number for your specific project.
What is the average lifespan of a railroad tie retaining wall?
Railroad tie walls typically last 20 to 30 years, though humid or wet climates often shorten that span due to faster wood rot.
Is it illegal to pick up old railroad ties?
It’s not illegal to remove and dispose of your own ties, but many waste facilities classify treated timber differently from regular yard debris, so check with your local waste management department before hauling them away.
What can I replace my railroad ties with?
Segmental concrete block, poured concrete, and natural stone are the standard modern replacements, since new creosote-treated ties aren’t approved for residential retaining wall use. Non-creosote timber or composite sleepers work only for small, low, non-structural walls.
Do I need a permit to replace a railroad tie wall?
If your replacement wall exceeds roughly 3 to 4 feet in height, many municipalities require a permit and sometimes an engineered design, so check local code before starting construction.
Recommended
Ready to get started in Kansas City's Northland?
GC Signature Outdoors serves Smithville, Platte City, Kearney, Liberty, and surrounding areas.