
Retaining Wall Drainage: What to Install and Why
- Installed per sq ft (wall face)
- $20–$45
- Typical project total
- $4,000–$15,000
Retaining Wall Drainage: What to Install and Why
A reliable retaining wall needs four things working together: a continuous granular drainage zone, a geotextile filter fabric, a 4" perforated collector pipe sloped to daylight, and surface grading that keeps runoff from pouring over the top. Get those right before you lay the first block.
Quick action checklist:
- Install at least 12" of clean, angular crushed stone (3/4") directly behind the wall
- Wrap or sock the perforated drain pipe in geotextile to prevent fines from clogging it
- Slope the pipe at a minimum 1% grade toward a daylighted outlet
- Separate the gravel zone from native soil with filter fabric
- Grade the surface above the wall away from it, and manage any downspouts or irrigation nearby
For an existing wall that’s showing signs of trouble, start at the outlet. Find where the collector pipe or weep holes should be discharging and confirm they’re actually flowing. A blocked outlet is the single fastest fix that can buy a wall more time. For a new build, plan the drainage before you excavate — it determines where the pipe exits and how much gravel you need.
Table of Contents
- Why does poor drainage cause retaining walls to fail?
- What components does every retaining wall drainage system need?
- How do you install retaining wall drainage step by step?
- What drainage mistakes cause retaining walls to fail?
- How do you inspect and maintain retaining wall drainage?
- Does your wall need drainage, and how big should the components be?
- When should you call an engineer or hire a contractor?
- Key Takeaways
- What most guides get wrong about retaining wall drainage
- GC Signature Outdoors LLC builds walls that drain properly from day one
- FAQ
- Where to learn more
Why does poor drainage cause retaining walls to fail?
Water is the primary enemy of any retaining wall, and the physics are straightforward. Dry soil pushes against a wall with a predictable lateral force. Saturated soil pushes much harder — poor drainage contributes to about 80% of retaining wall failures, and hydrostatic pressure can increase lateral forces by two to three times. A wall designed for dry-soil conditions simply wasn’t built to handle that.
The mechanism is worth understanding. When water accumulates behind a wall and has nowhere to go, it builds pressure in the pore spaces between soil particles. That pore pressure reduces the soil’s shear strength — the friction that keeps it stable — while simultaneously pushing outward against the wall face. Geotechnical design treats drainage as integral to wall stability, not as an afterthought, because without it, the backfill becomes a hydraulic piston.
“Poor drainage is by far the most common cause of poor performance for earth retention systems. Poor performance includes burdensome serviceability problems that can progress to outright failure of the earth retention system if not addressed.” — Iowa State University CTRE, Design of Maintainable Drains for Earth Retaining Structures
The failure mode most homeowners see is wall rotation or bulging at mid-height. Clay backfill is the classic culprit. Clay holds water, swells, and transmits pressure efficiently. After a heavy rain or a wet spring, a wall with clay backfill and no drainage system can shift noticeably — sometimes in a single storm event.
Surface water is underestimated just as often as groundwater. Roof downspouts, irrigation systems, and surface runoff frequently overwhelm subsurface drainage that would otherwise work fine. A swale above the wall, proper grading, and redirected downspouts are part of the drainage solution, not optional landscaping touches.
Pro Tip: The most commonly skipped step isn’t the pipe or the gravel — it’s the filter fabric. Without it, fine soil particles migrate into the gravel zone over time, clogging the system from the inside. You won’t see it happening until the wall starts to move.
What components does every retaining wall drainage system need?
Five components form the core of any properly designed system. Each one does a specific job, and skipping any of them shifts the load onto the others until something fails.
Clean granular backfill. Angular crushed stone, typically 3/4" or 1/2–3/4" clean stone, fills the zone directly behind the wall. Angular particles interlock and drain freely; rounded river rock or pea gravel drains but doesn’t compact as predictably. The stone must be clean — meaning low fines content — so water moves through it rather than pooling. A minimum 12" gravel zone is standard practice, with 18–24" preferred for heavier loads or poor native soils.
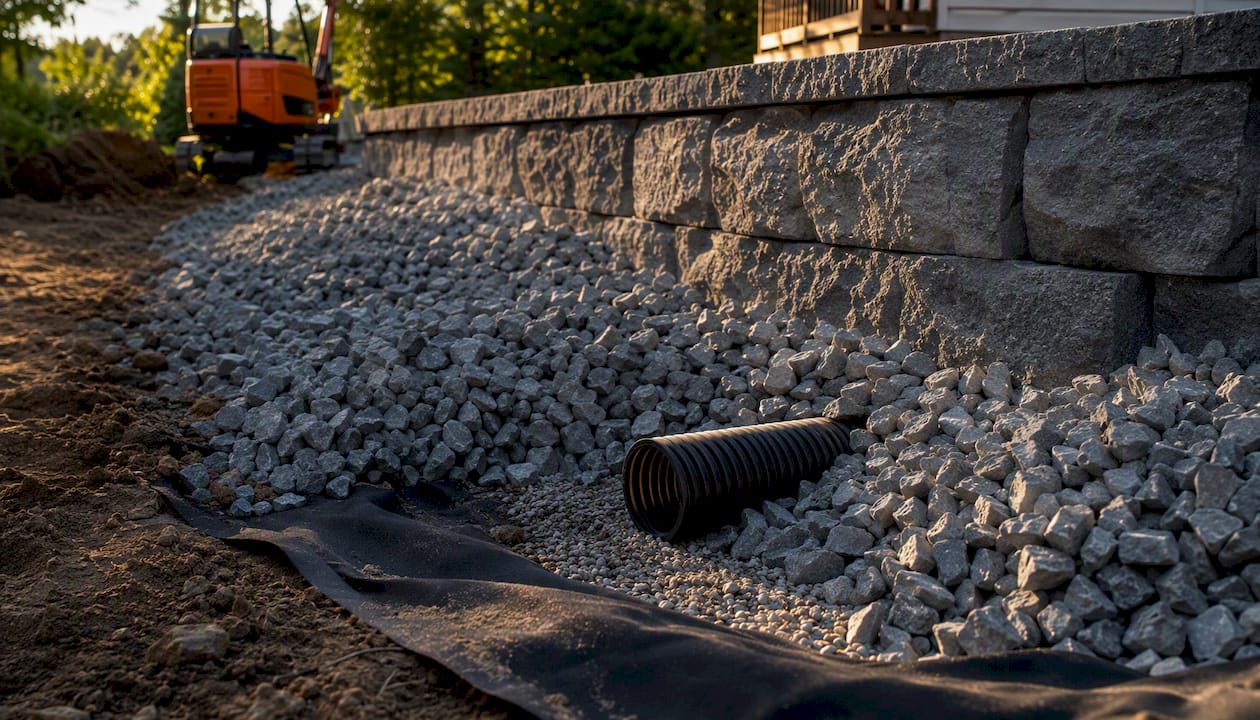
Geotextile filter fabric. This is the separation layer between the granular backfill and the native soil. It lets water pass through while blocking soil particles from migrating into the gravel zone. Without it, fine-grained native soil gradually infiltrates the stone, reducing drainage capacity over years. Use a non-woven geotextile rated for drainage applications; wrap it up the back of the gravel zone and fold it over the top before placing topsoil.
4" perforated collector pipe. Placed at the base of the gravel zone on a gravel bed, this pipe intercepts water that has moved through the backfill and carries it to an outlet. Allan Block’s water management guidance specifies 4" perforated flexible or rigid pipe, maintained at a minimum 1% gradient toward the outlet. Two options exist: a bare perforated pipe wrapped in fabric on-site, or a pre-fabricated socked pipe that comes with a sock already installed. Socked pipe is the better choice in fine-soil environments because the sock provides consistent filtration around the entire pipe circumference.
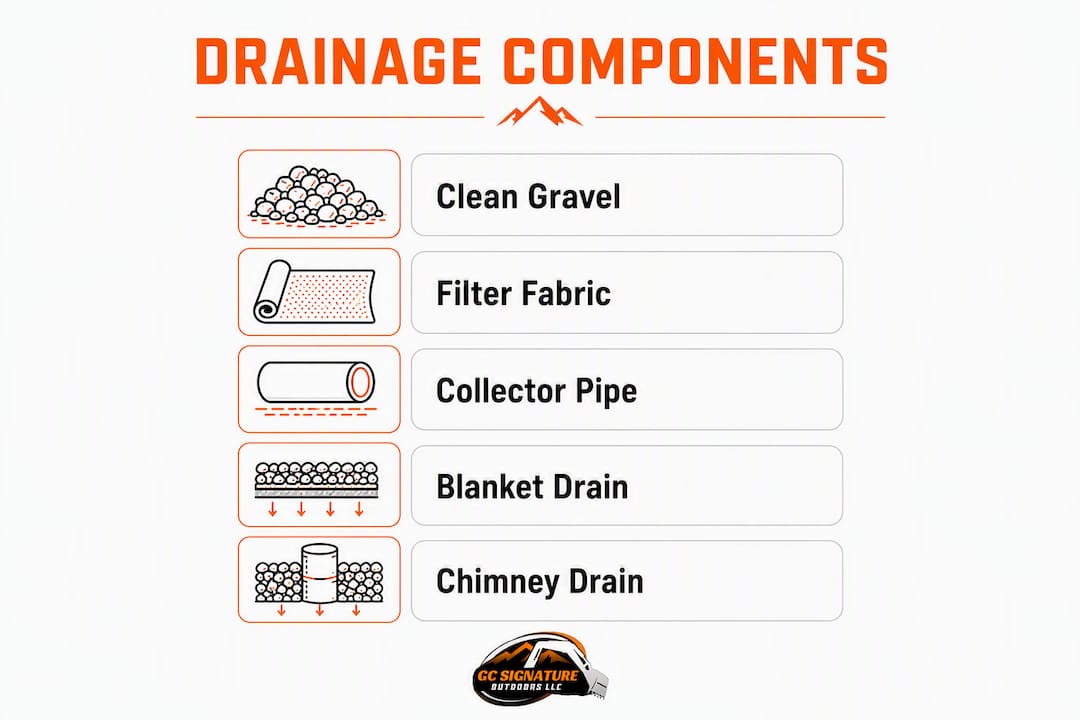
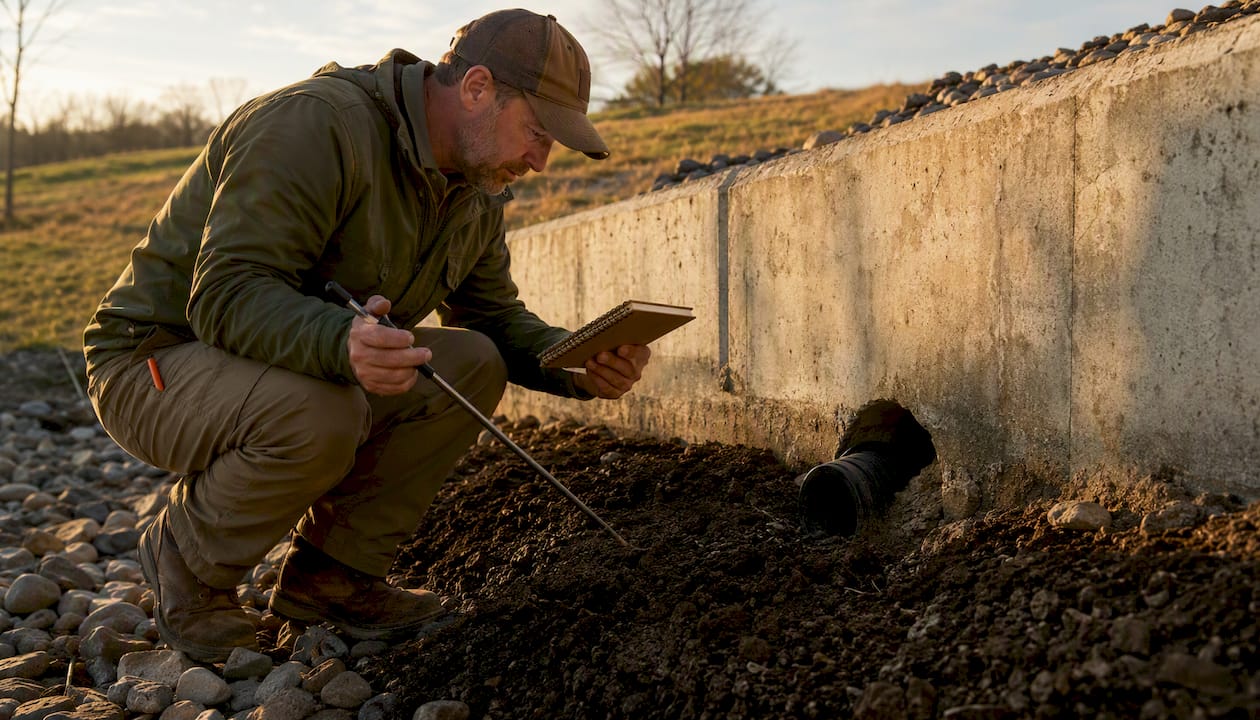
Daylighted outlet. The pipe has to go somewhere. The outlet should daylight — meaning it exits at a visible point on a slope or at the end of the wall — so you can confirm it’s flowing and clear it when needed. Outlets tied into underground drainage systems work too, but daylighted outlets are easier to inspect and maintain. Protect the outlet end with a rodent screen or outlet cover to prevent animals from nesting inside and blocking the pipe.
Weep holes (where applicable). Weep holes through the wall face provide a secondary pressure-relief path. For larger walls around 6 ft or taller, 3–4" weep holes spaced every 3–4 ft are appropriate; smaller walls use smaller holes at wider spacing. The critical point: weep holes supplement a gravel-and-pipe system. They don’t replace it.
“Without proper drainage, hydrostatic pressures can result in forces which can deform or even fail the entire wall system.” — Design of External Drainage Systems for Segmental Retaining Walls, Geosynthetics Society
Blanket and chimney drains. When native or infill soils have significant fines content or a friction angle below roughly 30°, a standard gravel zone behind the wall isn’t enough. Allan Block’s best practices recommend a chimney and blanket drain configuration in these conditions — a vertical chimney of gravel running the full height of the wall, connected to a horizontal blanket at the base. Drainage boards or geocomposite panels can substitute for thick gravel zones in tight spaces, though they require careful installation to maintain contact with the wall face.
A simple cross-section of a properly drained wall shows: native soil on the outside, geotextile fabric as the boundary, clean stone filling the zone behind the wall, the 4" perforated pipe sitting on a gravel bed at the base, and the pipe sloping toward a daylighted outlet at one or both ends.
Pro Tip: When specifying materials, ask for “clean crushed stone” by gradation — not “drainage gravel” generically. Suppliers sometimes substitute rounded or mixed-fines material that looks similar but drains poorly. Angular, washed stone with less than 5% passing the No. 200 sieve is what you want.
One sentence on local codes: outlet locations, discharge points, and any alteration to surface drainage may require a permit or must comply with local stormwater ordinances — check with your municipality before daylighting a pipe near a property line or street.
How do you install retaining wall drainage step by step?
The sequence matters as much as the materials. Here’s how a properly drained residential retaining wall goes in.
-
Call 811 before you dig. Mark underground utilities before any excavation. This is non-negotiable — gas, electric, and water lines run through residential yards at unpredictable depths.
-
Excavate to the correct depth. Dig the trench wide enough to accommodate the wall base, the gravel drainage zone, and working room. The base course of the wall typically sits on compacted gravel or a concrete leveling pad; the drainage zone extends behind it.
-
Place the base gravel bed. Lay 4–6" of clean crushed stone at the bottom of the trench behind the wall’s base course. This is the bed the collector pipe will rest on.
-
Set the perforated collector pipe. Place the 4" perforated pipe on the gravel bed with perforations facing down (some installers prefer sideways — either works; facing up collects sediment). Confirm the pipe slopes at least 1% toward the outlet end. On a 50-ft wall, that’s a 6" drop from one end to the other.
-
Install the geotextile fabric. Drape the fabric up the back of the excavation before backfilling with stone. It should extend from below the pipe level up to near the top of the gravel zone, with enough overlap to fold back over the top of the stone before topsoil goes in.
-
Backfill with clean crushed stone. Fill the zone behind the wall with angular clean stone to a minimum depth of 12". For walls retaining heavy loads, slopes, or clay-heavy native soil, a thicker gravel zone is worth the extra material cost.
-
Install weep holes as you build. For segmental block walls, leave gaps in the block joints at the base course or install weep hole inserts at regular intervals. For taller walls, space them every 3–4 ft horizontally.
-
Daylight the outlet. Route the pipe to a point where it exits freely — a slope face, the end of the wall, or a catch basin. Install a rodent screen or outlet cover. Allan Block recommends venting at intervals for long walls, with outlets every 50–100 ft depending on wall configuration.
-
Fold the fabric over the stone and place transition fill. Fold the top edge of the geotextile over the gravel zone before placing any native or topsoil above it. This prevents fines from washing down into the stone from above.
-
Finish with positive surface grading. Grade the surface above the wall to slope away from it — a minimum 2% grade for at least 6 ft back from the wall top. Redirect downspouts and irrigation heads so they don’t discharge directly behind the wall.
Dimensional reference table:
| Component | Typical Specification |
|---|---|
| Collector pipe diameter | 4" perforated (flexible or rigid) |
| Gravel zone thickness | 12" minimum; 18–24" for heavy loads or clay soils |
| Pipe slope | a gentle gradient sufficient to promote drainage |
| Outlet spacing (long walls) | at regular intervals to facilitate drainage |
| Weep hole size (tall walls) | appropriately sized for pressure relief |
| Weep hole spacing (tall walls) | spaced to provide consistent drainage relief |
| Surface grade above wall | sloping away to direct runoff from wall |
When to stop and call a professional: If the wall is taller than 4 ft, shows any existing lean or bulging, sits near a structure or property line, or the site has uncertain groundwater conditions, this is contractor and potentially engineer territory. Excavation near a leaning wall is also a collapse risk — don’t work under or adjacent to an unstable structure.
Retrofitting an existing wall is possible but limited. Adding weep holes by drilling through the wall face provides relief. Trenching a toe drain along the base of the wall and daylighting it is more effective but requires careful excavation. If the wall is already moving, drainage work alone won’t fix structural damage — the wall may need to be rebuilt.
What drainage mistakes cause retaining walls to fail?
Most wall failures aren’t caused by one catastrophic error. They result from several small bad decisions stacking over time — each one manageable on its own, but compounding into failure after a wet season or heavy storm.
- Skipping the geotextile. The most common omission. Without fabric, fine soil migrates into the gravel zone within a few years, clogging the system silently.
- Using fine or mixed backfill. Topsoil, clay, or contractor fill behind the wall retains water instead of draining it. Only clean, angular crushed stone belongs in the drainage zone.
- No outlet or a blocked outlet. A pipe that doesn’t daylight, or one whose outlet is buried under mulch or soil, can’t drain. Check that the outlet is visible, clear, and actually discharging after rain.
- Insufficient gravel depth. A 4–6" strip of gravel isn’t a drainage zone. Twelve inches is the minimum; less than that and the system can’t handle a significant rain event.
- Flat or reverse-sloped pipe. A pipe with no slope, or one that dips and holds water, doesn’t drain by gravity. It becomes a sediment trap.
- Relying only on weep holes. Weep holes help, but they’re supplemental. A wall with weep holes and no gravel-and-pipe system behind it is still vulnerable to hydrostatic pressure between the holes.
- Poor surface grading above the wall. A flat or inward-sloping surface above the wall funnels every rain event directly into the backfill. Downspouts discharging near the wall compound this significantly.
- No pipe protection at the outlet. An unprotected outlet gets blocked by rodents, debris, or soil over time. A simple screen extends system life considerably.
Pro Tip: One of the most cost-effective retrofits for a struggling wall is creating a swale above it — a shallow, grass-lined channel that intercepts surface runoff before it reaches the wall. Combined with clearing the outlet, this two-step fix resolves a surprising number of drainage complaints without rebuilding anything.
Annual inspection should catch most of these issues before they become structural problems. Look for wet spots or staining on the wall face, outlets that aren’t flowing after rain, and any surface grading that has settled toward the wall.
How do you inspect and maintain retaining wall drainage?
The single most important maintenance task is confirming the collector pipe outlet is clear and actually discharging. Everything else follows from that.
What to check during each inspection:
- Outlet is visible, unobstructed, and discharging during or after rain
- Weep holes are open and show moisture or flow after wet weather
- No wet staining, efflorescence, or persistent damp patches on the wall face
- Wall face shows no bulging, leaning, or cracking
- Surface grading above the wall still slopes away (soil settles over time)
- No vegetation with aggressive roots growing directly behind or through the wall
- Sediment or debris accumulation at outlet or weep holes
Inspection timing:
- After any significant rain event (1"+ in 24 hours)
- Annually before the wet season or before freeze-thaw cycles begin
- After any nearby excavation, grading, or construction activity
Simple DIY remediation steps:
- Clear debris from outlets and weep holes with a garden hose or flexible brush
- If an outlet is buried, carefully excavate to expose and re-daylight it
- Re-grade surface soil above the wall if it has settled toward the wall face
- Redirect downspouts or irrigation heads that discharge near the wall
Keep a simple photo log: date, a photo of the outlet, a photo of the wall face, and any notes on recent rainfall. Two minutes per inspection, and you’ll catch problems years before they become expensive.
If you find a blocked outlet you can’t clear, persistent wet spots that don’t dry between rain events, or any wall movement at all, schedule professional service. Those signs indicate the drainage system is failing or the wall has already begun to shift.
Does your wall need drainage, and how big should the components be?
Almost every wall that retains soil needs some form of drainage. Even a 2-ft garden wall benefits from a footing drain if it sits in clay soil or a low spot. The question isn’t whether to drain — it’s how much drainage the site requires.
Quick sizing reference:
| Feature | Rule of Thumb |
|---|---|
| Pipe diameter | 4" perforated, always |
| Gravel zone depth | 12" minimum; 18–24" in clay or for walls over 4 ft |
| Pipe slope | 1% minimum (1 ft drop per 100 ft of run) |
| Outlet spacing | Every 50–100 ft for long walls |
| Weep holes (walls ~6 ft+) | 3–4" diameter, every 3–4 ft |
| Weep holes (walls under 4 ft) | 1–2" diameter, every 4–6 ft |
| Surface grade above wall | sloping away to direct runoff |
Does a 2–3 ft wall need drainage? Yes, if it retains soil in clay-heavy ground or sits in an area that collects runoff. A short wall in sandy, well-draining soil with good surface grading may get by with a simple footing drain and gravel zone. When in doubt, install the full system — the cost difference is small compared to rebuilding.
Where should the pipe sit — toe, heel, or raised? The standard placement is at the base of the wall (the toe), on a gravel bed, with the pipe running the full length of the wall. Raised placement partway up the gravel zone is used in specific chimney-drain configurations, but for most residential walls, base placement is correct.
Clay vs. sandy soil. Clay soil has low permeability and holds water; it requires a thicker gravel zone and often a chimney-drain configuration. Sandy soil drains naturally but still needs fabric separation to prevent migration. When infill soils have significant fines content or a friction angle below roughly 30°, a chimney and blanket drain is the appropriate design rather than a simple backfill zone.
When should you call an engineer or hire a contractor?
Some drainage work is straightforward DIY. Other situations require professional judgment, and getting that wrong is expensive.
Call a professional when:
- The wall is taller than 4 ft (many jurisdictions require a permit and engineer stamp at this height)
- You see any existing lean, bulge, or cracking in the wall
- The site has unknown or high groundwater conditions
- Utilities run through the excavation area
- The wall is part of a terraced system or retains a slope above it
- A previous drainage fix didn’t hold
Decision guide:
- Outlet is blocked, wall looks fine: Clear it yourself; monitor after next rain.
- Wet spots on wall face, no movement: Inspect outlet and surface grading; DIY fix likely sufficient.
- Wall is leaning or bulging: Stop. Call a contractor or geotechnical engineer before doing anything else.
- Wall over 4 ft with no visible drainage outlet: Call a contractor for assessment; this likely needs a retrofit or rebuild.
- Repeated failures after repairs: Geotechnical engineer needed to assess soil and groundwater conditions.
Before calling, collect: wall length and height, photos of the wall face and any outlets, soil type if known, and a description of recent weather or events that preceded the problem. That information cuts the assessment time significantly.
Pro Tip: Check with your local municipality before daylighting a new outlet or altering surface drainage. Work that changes how stormwater leaves your property may require a permit, and discharging onto a neighbor’s property or into a street without approval creates liability.
For homeowners in Smithville, Platte City, Kearney, and the KC Northland area, GC Signature Outdoors LLC offers on-site assessments for retaining wall drainage concerns — see the retaining wall service page for scope details.
Key Takeaways
Proper retaining wall drainage requires a continuous granular zone, geotextile separation, a 4" perforated collector pipe sloped to daylight, and surface grading that keeps runoff away from the wall.
| Point | Details |
|---|---|
| Drainage prevents failure | Poor drainage contributes to about 80% of retaining wall failures, increasing lateral loads by two to three times due to hydrostatic pressure. |
| Core system components | Install clean crushed stone (12" minimum), geotextile fabric, a 4" perforated pipe at 1% slope, and a daylighted outlet. |
| Weep holes are supplemental | Weep holes relieve pressure but do not replace a gravel-and-pipe drainage system behind the wall. |
| Inspect seasonally | Check outlets and wall face after heavy rain and annually before wet season; clear debris and re-grade surface soil as needed. |
| GC Signature Outdoors LLC | Serves KC Northland homeowners with drainage assessment, retrofit, and full retaining wall construction in Smithville, Platte City, and Kearney. |
What most guides get wrong about retaining wall drainage
The conventional framing treats drainage as a materials checklist: get the right pipe, the right gravel, the right fabric, and you’re done. That framing misses the actual failure pattern.
Most walls that fail don’t fail because one component was missing. They fail because several small compromises stacked up. The contractor used rounded pea gravel instead of angular stone because it was on the truck. The fabric got skipped because it added an hour to the job. The outlet got buried under finish grading because nobody marked it. Each decision seemed minor. Together, they created a system that worked fine for two years and then moved three inches in a single wet spring.
The other thing guides underemphasize is surface water. A homeowner can install a textbook drainage system behind the wall and still have problems if a downspout discharges six feet uphill from the wall, or if the surface grade has settled flat over three years. The pipe and gravel handle subsurface water. Surface water management — grading, swales, downspout routing — is a separate job that has to be done alongside it.
The practical implication: when budgeting a retaining wall project, drainage isn’t a line item to trim. More gravel is almost always worth it. Socked pipe in fine-soil conditions is worth the small premium. Marking the outlet location with a stake or flag before finish grading takes two minutes and saves hours of excavation later. These aren’t upgrades — they’re the baseline for a wall that lasts.
GC Signature Outdoors LLC builds walls that drain properly from day one
Drainage retrofits are possible, but they’re always more expensive and more disruptive than getting it right during the original build. GC Signature Outdoors LLC designs and installs retaining walls in Smithville, Platte City, Kearney, and the surrounding KC Northland area with drainage built into the excavation plan from the start — not added as an afterthought.

The team handles site assessment, drainage design, gravel zone and pipe installation, and surface grading as part of every retaining wall project. For existing walls showing signs of drainage problems, GC Signature Outdoors LLC also offers drainage inspections and retrofit services. Browse completed projects in the KC Northland portfolio to see the quality of work firsthand, then request an estimate with your wall dimensions, a few photos of the site, and a description of any current issues. The team will take it from there.
FAQ
What is the best drainage system behind a retaining wall?
A continuous zone of clean angular crushed stone (minimum 12" deep), a geotextile filter fabric separating it from native soil, and a 4" perforated collector pipe sloped at 1% to a daylighted outlet. Weep holes provide supplemental relief but don’t replace this system.
Does a 2 ft retaining wall need drainage?
Usually yes, especially in clay soil or low-lying areas that collect runoff. A short wall in well-draining sandy soil with good surface grading may manage with a simple footing drain, but installing the full system costs little extra and prevents future problems.
What is the 1-in-3 rule for retaining walls?
The 1-in-3 rule refers to batter — the wall should lean back into the slope at an angle promoting structural stability. This improves structural stability by shifting the wall’s center of gravity toward the retained soil, reducing the overturning force the wall must resist.
What are the most common retaining wall drainage mistakes?
Skipping the geotextile fabric, using fine or mixed backfill instead of clean crushed stone, burying or blocking the outlet, installing insufficient gravel depth, and relying solely on weep holes without a collector pipe and gravel zone behind the wall.
Where to learn more
Authoritative references worth bookmarking before you build or call a contractor:
- Geokinetics: Geotechnical Retaining Wall Design — engineering-level explanation of earth pressures, hydrostatic loading, and how drainage components address each failure mechanism; useful background before meeting with an engineer.
- Iowa State CTRE: Design of Maintainable Drains for Earth Retaining Structures — research-backed design guide covering weep holes, maintainable drain systems, and failure case studies; the most authoritative free resource available.
- GC Signature Outdoors LLC retaining wall services — local contractor resource for KC Northland homeowners needing assessment, drainage retrofit, or new wall construction in Smithville, Platte City, and Kearney.
Recommended
- Retaining Wall Cost in Kansas City: 2026 Pricing Guide | GC Signature Outdoors
- Retaining Wall Cost — KC Northland | GC Signature Outdoors
- Retaining Wall Builders in Platte City & Smithville, MO | GC Signature Outdoors
- Concrete Control Joints: Code Standards and Best Practices | GC Signature Outdoors
Ready to get started in Kansas City's Northland?
GC Signature Outdoors serves Smithville, Platte City, Kearney, Liberty, and surrounding areas.