
The Right Way to Prep a Retaining Wall Base for a Wall That Lasts
- Installed per sq ft (wall face)
- $20–$45
- Typical project total
- $4,000–$15,000
The Right Way to Prep a Retaining Wall Base for a Wall That Lasts
For most DIY segmental retaining walls, retaining wall base prep means a 6 inch compacted base of clean, angular #57 or #67 crushed stone, a first course buried using the 1 inch per 1 foot of exposed height rule (6 inches minimum), and a drainage system built from a 12 inch stone column and a 4 inch perforated pipe sloped to daylight. That combination handles the two forces working against your wall: gravity pulling the soil forward and water building up pressure behind it.
The caveat matters as much as the recipe. Walls taller than about 4 feet, walls carrying a driveway or patio load above them, or sites with heavy clay and high groundwater move past DIY territory and into engineered-design territory.
- Base: 6 in of compacted #57/#67 crushed stone
- Embedment: 1 in per 1 ft of exposed height, 6 in minimum
- Drainage: 12 in stone column + 4 in perforated pipe sloped to daylight
- Stop point: walls over ~4 ft, surcharge loads, or unstable soil
Pro Tip: If you’re not sure whether your project crosses the DIY line, measure the exposed face height at the tallest point of the finished wall, not at the average. That number decides everything else.
Key Takeaways
Retaining wall base prep succeeds when a 6 inch compacted crushed stone base, correct embedment depth, and a functioning drainage column all come together before the first block is set.
| Point | Details |
|---|---|
| Use the right base stone | Compact 6 in of clean, angular #57 or #67 crushed stone; skip stone dust and screenings entirely. |
| Follow the embedment rule | Bury the first course 1 in per 1 ft of exposed height, with 6 in as the practical minimum. |
| Build drainage in from day one | Install a 12 in stone column with a 4 in perforated pipe sloped to daylight, wrapped in filter fabric. |
| Compact in thin lifts | Compact stone in 2 to 3 in lifts and confirm with the boot test before moving on. |
| Know your DIY limit | Walls over roughly 4 ft, surcharge loads, or poor soils call for an engineer or permit review. |
| Hire when scope grows | GC Signature Outdoors LLC applies these same base and drainage standards on every retaining wall build in the KC Northland area. |
Table of Contents
- What Tools and Materials Do You Need for Retaining Wall Base Prep?
- How Do You Prepare the Base for a Retaining Wall Step by Step?
- How Do You Handle Drainage Behind a Retaining Wall?
- How Do You Know When Base Compaction Is Good Enough?
- How Deep Does a Retaining Wall Footing Need to Be?
- What Homeowners Get Wrong About Base Prep
- Get Help Building a Retaining Wall That Actually Lasts
- Sources
- FAQ
What Tools and Materials Do You Need for Retaining Wall Base Prep?
You don’t need a construction fleet, but a few rentals make the difference between a wall that sits flat for decades and one that heaves after two winters.
Hand tools: a flat shovel, a mattock for root-bound soil, a wheelbarrow, a tape measure, a 4-foot level, mason’s line and stakes, and a rubber mallet for setting blocks. For equipment, rent a walk-behind plate compactor, a hand tamper for tight corners the plate can’t reach, and a masonry saw if you’re cutting blocks to fit a run.
Materials matter more than most DIYers expect. Use clean, angular #57 or #67 crushed stone for the base, 3/4 inch clean drainage stone for the column behind the wall, a 4 inch perforated corrugated HDPE pipe (sock-wrapped or later wrapped in fabric), and a non-woven geotextile fabric rated to AASHTO M288 Class 2. If your wall crosses roughly 4 feet or sits below a slope, add geogrid to the shopping list.
- Skip stone dust, screenings, and pea gravel behind the wall. Fines clog drainage and compact into something closer to concrete than crushed stone, working against the very drainage system you’re building.
- Rough quantity math: for a 20 foot wall, 6 inches deep, 2 feet wide, plan on roughly 2.5 to 3 tons of base stone, plus drainage stone scaled to wall height.
How Do You Prepare the Base for a Retaining Wall Step by Step?
Base prep follows a fixed order. Skip a step and the wall tells you about it eventually, usually after a hard rain.
- Assess and plan. Mark your wall line with stakes and mason’s line. Call 811 or your local utility locate service before you dig anywhere. Watch how water moves across the site during a rain, since that tells you where the drainage pipe needs to exit. Then calculate your trench depth: block height, plus embedment (1 inch per foot of exposed height, 6 inch minimum), plus 6 inches of base stone.
- Excavate the trench. Dig a trench roughly 24 inches wide, or twice the depth of your block, whichever is greater, per NCMA-aligned spec guidance. Machine-dig the bulk of it, then hand-dig the last few inches to avoid disturbing the subgrade you’re about to build on. Don’t undermine the soil under adjacent turf or sidewalks while you work.
- Prep the subgrade. Strip all topsoil, roots, and organic material from the trench bottom. Any soft spots get excavated further and backfilled with compacted granular fill. Native soil that’s firm and well-drained can often be compacted in place; soft or wet soil needs to be undercut and replaced.
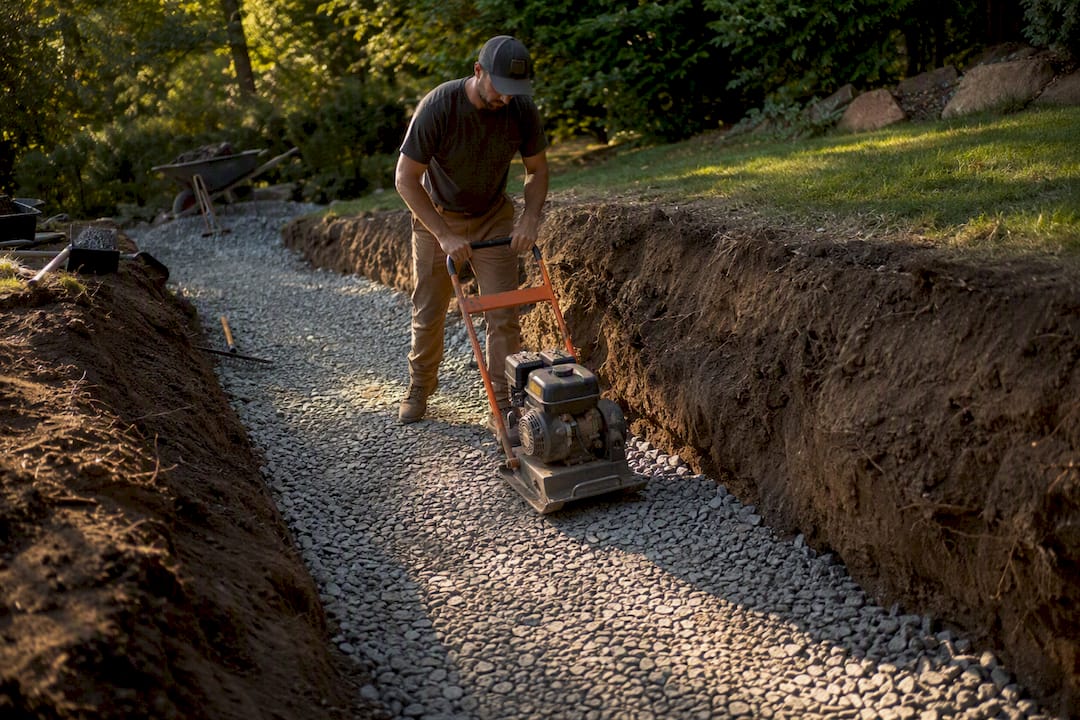
- Place base stone in lifts. Add crushed stone in two roughly 3 inch lifts to reach a total of 6 inches, compacting each lift separately with the plate compactor. Never dump the full 6 inches and compact once. A single deep lift compacts on top and stays loose underneath, which is exactly where you don’t want looseness.
- Screed and level. Drag a straightedge across the trench and check it with a 4 foot level at several points along the run. The base needs to be flat, not just level. A dip of even half an inch under the first course telegraphs upward through every course above it.
- Set and verify the first course. Place your first row of blocks at the correct embedment depth, then check the long line with a level and a taut string. This is your last chance to fix a mistake cheaply. Every following course amplifies whatever error is baked into row one.
How Do You Handle Drainage Behind a Retaining Wall?
Drainage failure causes more residential wall collapses than any other single factor, more than bad soil, more than undersized blocks, more than poor embedment. Poor water management turns retained soil into a waterlogged mass pushing against the wall with far more force than dry soil ever would.
Start by running non-woven filter fabric up the back of the trench wall and across the base before you place any stone, overlapping seams by at least a foot so soil can’t migrate into your drainage zone. Lay a 4 inch perforated HDPE pipe at the back of the first course, sock-wrapped or fabric-wrapped, sloped at 1/8 to 1/4 inch per foot toward a daylight outlet. Build a 12 inch wide column of clean #57/#67 stone directly behind the wall that rises with each course, stopping about 6 inches below the finished top of the wall so soil caps it off.
- Backfill the rest of the reinforced zone with granular select fill in 8 inch lifts, compacted before adding the next lift.
- Keep native clay out of the drainage zone entirely; it defeats the purpose of the stone column.
- Walk the site after the first heavy rain and confirm water is actually exiting the pipe outlet, not pooling behind the wall.
- Screen the outlet with a rodent guard so it doesn’t clog or become a den entrance.
How Do You Know When Base Compaction Is Good Enough?
Compaction is where most DIY walls quietly fail, because loose stone looks identical to compacted stone until the wall’s already built on top of it.
- Place stone in 2 to 3 inch lifts, never deeper. Run the plate compactor over each lift with multiple overlapping passes, working in a consistent pattern across the trench.
- Run the boot test after each lift: stand on the compacted stone with your full weight. If your boot leaves a visible impression, the lift isn’t done. Compact again.
- Screed the final surface with a straight 2x4 and check flatness with a 4 foot level at several points, not just the center.
- If the base still feels soft after repeated passes, don’t add more compaction time hoping it fixes itself. Excavate deeper and replace with fresh stone.
Common mistakes: skipping lifts to save time, soaking the stone thinking it compacts better wet (it doesn’t, angular stone locks together dry), and substituting fine screenings because they’re cheaper than clean crushed stone.
How Deep Does a Retaining Wall Footing Need to Be?
The embedment rule is simple: bury the first course 1 inch for every 1 foot of exposed wall height, with 6 inches as the absolute minimum. A 2 foot wall needs 6 inches of embedment (the minimum kicks in). A 3 foot wall needs 6 inches too, since 3 inches would fall under the floor. A 4 foot wall needs 4 inches, rounded up to the practical minimum most installers use, which is still 6 inches for stability.
- Concrete footings become appropriate for tall walls, walls carrying surcharge loads, poor bearing soils, or sites where frost depth affects the design.
- A rule of thumb for cantilever footings: width often runs 50 to 70 percent of the retained height, checked against sliding, overturning, and bearing capacity.
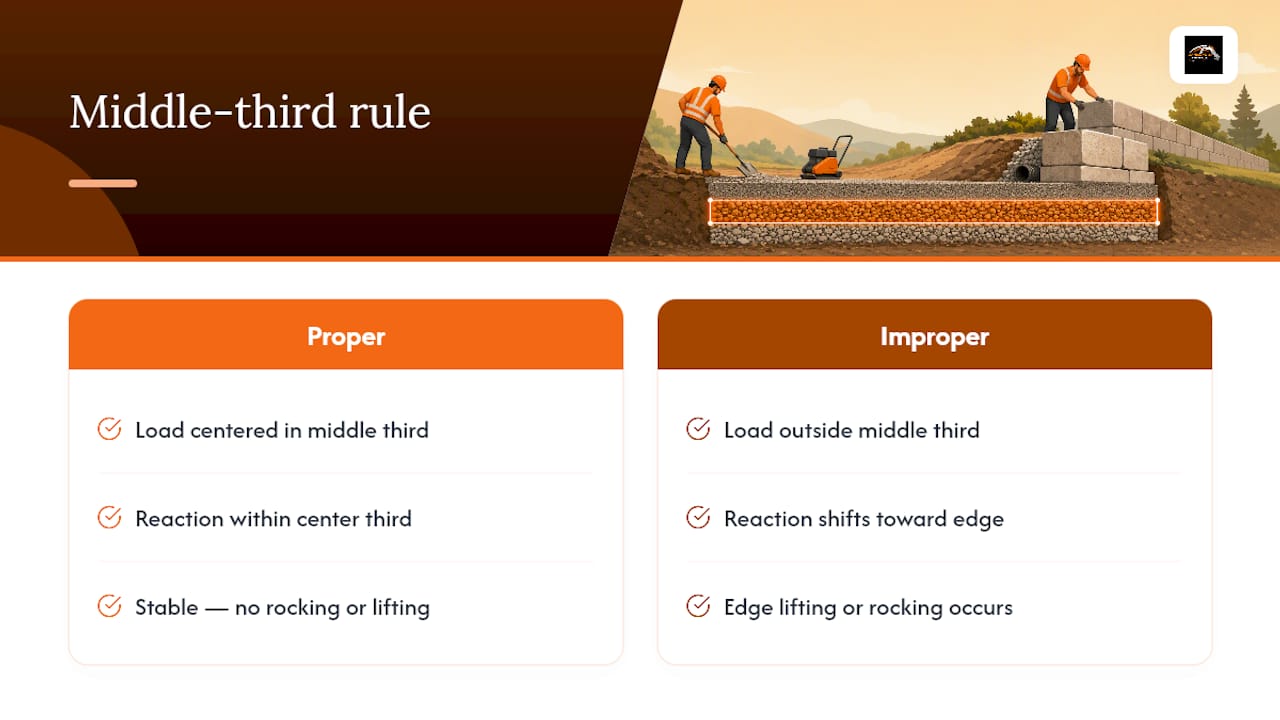
- The middle-third rule keeps the footing’s load reaction within the center third of its width, preventing the edge lift that causes rocking over time.
- Frost depth in cold climates often drives footing depth more than the wall’s own weight does; check your local frost line before finalizing a design.
When Should You Call an Engineer or Pull a Permit?
A few site conditions push a project past reasonable DIY scope: walls exceeding roughly 4 feet of exposed height, any wall supporting a driveway, patio, or structure above it, and sites with uncertain soil or visible groundwater in the excavation.
- A geotechnical or engineering review checks bearing capacity, groundwater depth, and required geogrid length and spacing.
- Before that call, gather site photos, measured wall height, a rough soil description, and confirmed utility locate marks.
- Most municipalities require permits above a specific height threshold, so check local building codes before you excavate.
How GC Signature Outdoors’ Field Experience Confirms This Approach
GC Signature Outdoors LLC is a family-run outfit that’s built a portfolio of retaining walls, paver patios, and outdoor living spaces across the KC Northland, using professional-grade compaction equipment and clean crushed stone on every job.
- The same base depth, embedment, and drainage standards outlined above are what the crew uses on every retaining wall build.
- For taller walls or sites needing permit review, the team can help homeowners work through engineering and permitting requirements.
- Homeowners weighing DIY against hiring a pro can review real project scope and pricing context before deciding.
What Homeowners Get Wrong About Base Prep
Most retaining wall guides treat base prep as a formality before the “real” work of stacking blocks. That’s backward. The stacking is the easy part. Everything that determines whether the wall stands in ten years happens before the first block goes down, and it’s almost entirely invisible once the wall is finished.
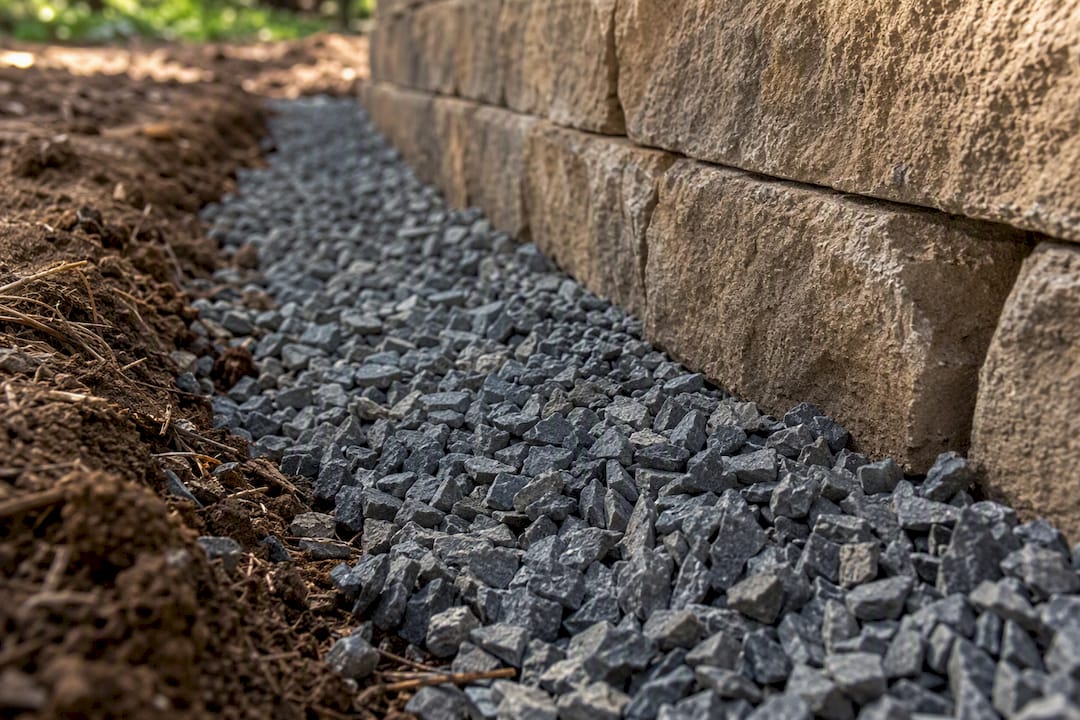
The biggest gap between conventional advice and reality is compaction depth. Plenty of guides tell you to compact “the base” without specifying lift thickness, and DIYers dump six inches of stone in one pour and run a compactor over the top once. That compacts the top two inches and leaves the bottom loose, which is functionally the same as building on unprepared soil. The research on retaining wall longevity consistently points back to base and drainage prep as the two failure points that matter most, and both get shortcut constantly.
If you take one thing from this article, take the boot test seriously and don’t skip fabric under the drainage stone. Everything else is measurements you can look up. Those two are judgment calls only you can make standing in the trench.
Get Help Building a Retaining Wall That Actually Lasts
GC Signature Outdoors LLC is the option for KC Northland homeowners who’d rather not rent a plate compactor for a weekend and gamble on getting the drainage right the first time. The real advantage isn’t just skill with a shovel. It’s that every wall gets built with the same base depth, embedment, and drainage standards covered in this guide, using professional-grade compaction equipment that a weekend rental often can’t match for consistency.

Whether you’re weighing a full build against DIY or just want a second opinion on a tricky slope, the crew handles everything from initial grading through the finished stone. Homeowners in Smithville, Platte City, Kearney, and the surrounding KC Northland communities can browse completed retaining wall and hardscape projects for a sense of scope and craftsmanship. If your site has a driveway surcharge, a steep grade, or soil that’s clearly holding water, reach out for a quote on a professionally built retaining wall before you break ground on your own.
Sources
- Best practices for SRW base and embedment — Allan Block (blog)
- Allan Block best practices for SRW (spec manual excerpt, WestbrookBlock host)
- How to build a retaining wall — RemodelCalculators (how-to)
FAQ
What Should You Use for a Base for a Retaining Wall?
Use 6 inches of compacted, clean angular #57 or #67 crushed stone. Avoid stone dust, screenings, or pea gravel, since fines clog drainage and reduce the base’s ability to lock together.
What Is the 1/3 Rule for Retaining Walls?
It usually refers to the middle-third rule for footings: the load reaction should stay within the center third of the footing’s width to prevent the edges from lifting or rocking under pressure.
Does a 2 Foot Retaining Wall Need a Footing?
A 2 foot wall typically needs 6 inches of embedment into a compacted crushed stone base rather than a poured concrete footing, since concrete footings are generally reserved for taller walls, surcharge loads, or poor soils.
Do You Put Gravel or Dirt Behind a Retaining Wall?
Clean drainage stone belongs directly behind the wall in a dedicated 12 inch column, not native soil or dirt. Backfill farther back can use granular select fill, but native clay should stay out of the drainage zone entirely.
Recommended
Ready to get started in Kansas City's Northland?
GC Signature Outdoors serves Smithville, Platte City, Kearney, Liberty, and surrounding areas.