
Fire Pit Size Guide: Finding the Right Fit for Your Yard
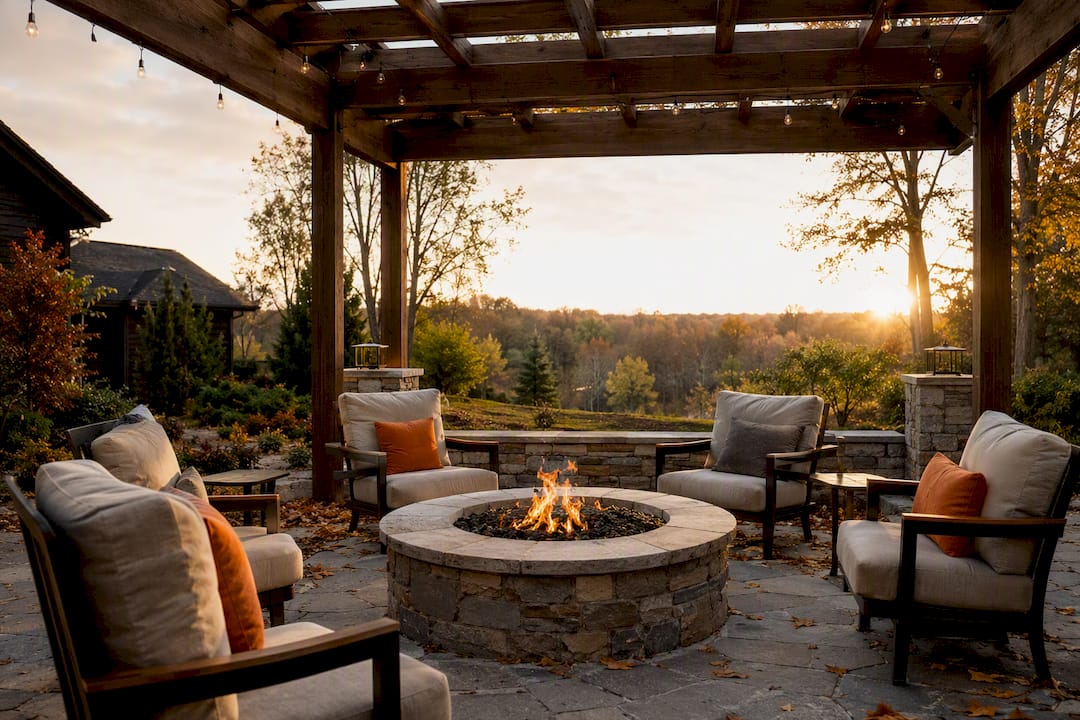
Fire Pit Size Guide: Finding the Right Fit for Your Yard
For most homeowners, a 36 to 44 inch diameter fire pit hits the sweet spot, seating 4 to 6 people comfortably without swallowing the whole patio. If your space is tight, a 24 to 30 inch pit works better for 2 to 4 people on smaller patios. If you entertain often or have room to spare, 48 to 60+ inches suits bigger groups and built-in masonry designs.
That said, the “right” number depends on three things before you buy anything:
- Fuel type — wood-burning pits generally need more breathing room than gas.
- Available footprint — the pit plus its safety buffer shouldn’t crowd out your seating.
- Local code — some municipalities regulate size, placement, or require permits for permanent installations.
Check manufacturer specs and local fire code before finalizing a purchase or build, as numbers vary with conditions. The ranges below are planning starting points, not universal rules.
Key Takeaways
A 36 to 44 inch fire pit fits most homeowners, but the real deciding factors are patio footprint, fuel type, and local clearance code.
| Point | Details |
|---|---|
| Default size | Choose 36–44 inches for 4–6 people; it’s the most versatile family range. |
| Small-space option | Use 24–30 inches for patios under about 100 square feet and 2–4 guests. |
| Clearance from structures | Plan 10–25 feet for wood pits, often 5–10 feet for gas, per manufacturer specs. |
| Patio-to-pit ratio | Keep the pit and its safety zone under one-third of total patio area. |
| Professional installation | GC Signature Outdoors LLC builds permanent pits with correct drainage, code compliance, and permitting handled. |
Table of Contents
- Fire Pit Size Guide: What Actually Changes the Right Diameter
- Recommended Pit Sizes by Group and Space
- Planning Your Patio Around the Fire Pit
- Clearance and Setback Distances You Can’t Skip
- How Fire Pit Type and Material Affect Real-World Size
- The On-Site Checklist Before You Buy or Build
- When a Permanent Fire Pit Calls for a Professional Build
- Don’t Forget Maintenance Space When You’re Sizing the Pit
- Field Tips From Our Crews: Common Pitfalls and Easy Upgrades
- Ready to Build a Fire Pit That Fits Your Yard, Not a Chart
- Sources
- FAQ
Fire Pit Size Guide: What Actually Changes the Right Diameter
Picking a pit diameter off a chart is the easy part. The harder part is knowing which variables in your own yard should push you up or down from that number.
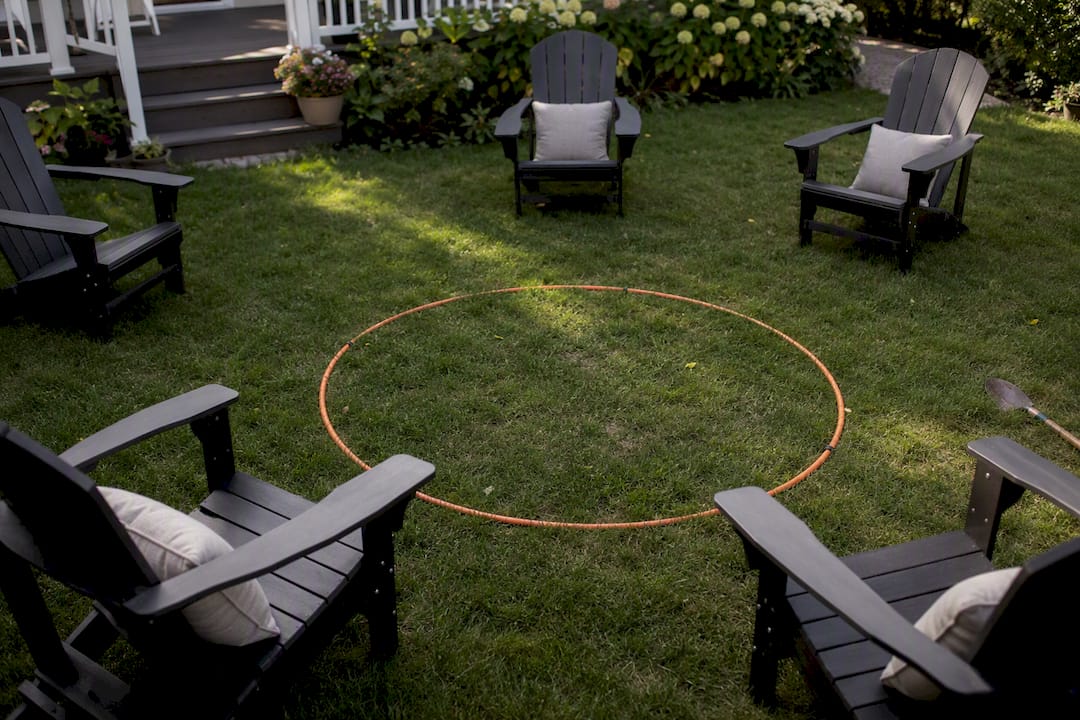
Start by measuring your usable outdoor footprint, not just the patio slab. Walk the space with a tape measure or a can of marking spray and note where the pit could realistically sit once you account for doors, walkways, grills, and planting beds. A lot of homeowners guess at square footage and end up with a pit that technically fits but leaves no room to pull a chair back. Marking the actual pit diameter plus its clearance zone on the ground, even roughly, catches that problem before you spend a dime.
Next, count heads honestly. A pit sized for “the family” often gets used by neighbors, in-laws, and the occasional block party. Design guidance generally allots 24 to 48 inches between each seated person and the flame for comfortable warmth, plus enough width for a chair. Six people sitting shoulder to shoulder around a 36 inch pit will feel cramped; the same six people around a 44 inch pit have breathing room.
Fuel source changes the math more than most people expect. Wood-burning pits throw embers, need more airflow, and generally call for wider clearance from structures and plantings. Gas pits burn cleaner and cooler at the edges, which is why gas installations often allow closer placement to structures than wood, depending on local code, sometimes by a wide margin, depending on your local code and the unit’s own listing. Portable pits split the difference: they’re easier to reposition away from wind or foot traffic, but still carry real clearance requirements once lit.
Finally, decide what you actually want the fire for. A pit built mainly for ambiance and s’mores can run smaller and shallower. One meant for actual cooking, searing, or extended winter use benefits from a larger diameter and higher BTU output, which in turn pushes clearance requirements up. Chasing a bigger flame without planning for the heat it throws is one of the most common regrets homeowners report after installation.
Recommended Pit Sizes by Group and Space
Matching diameter to group size is the fastest way to shortcut the guesswork, but the details inside each range matter as much as the range itself.
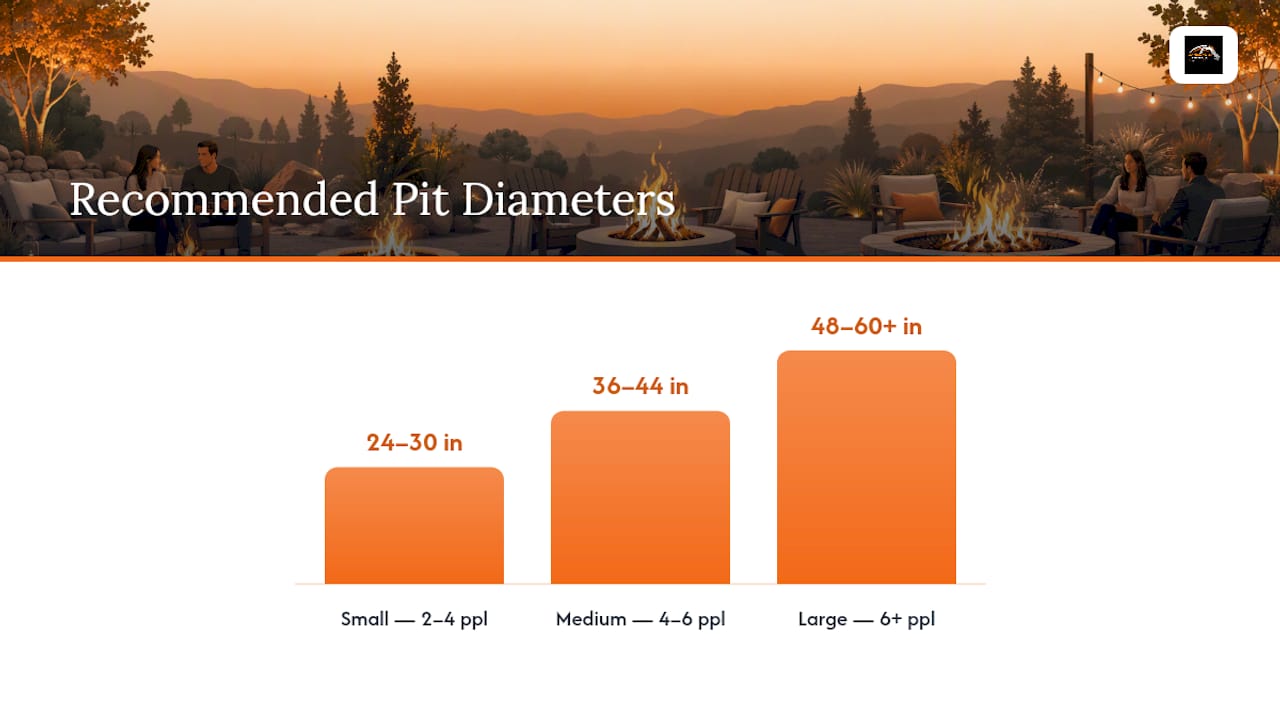
Small pits (24 to 30 inches) fit patios under roughly 100 square feet and groups of 2 to 4 people. These compact sizes concentrate heat efficiently and dominate the portable fire pit market, since they’re light enough to move for mowing, patio cleaning, or seasonal storage. If you’re working with a townhome patio or a narrow side yard, this is your range.
Medium pits (36 to 44 inches) are the default recommendation for good reason. Multiple sizing charts point to this range as the most versatile, family-friendly option, comfortably seating 4 to 6 people while still fitting a standard 12x12 or larger patio. Many permanent backyard installs are around this size range.
Large pits (48 inches and up) suit bigger gatherings, built-in masonry designs, and homeowners who genuinely entertain. This range usually pairs with a larger safety zone, and built-in versions are far more likely to trigger a permit requirement than a portable steel bowl.
Height matters just as much as diameter, though it gets less attention. Professionals commonly set rim height between 14 and 18 inches for standard viewing and containment, which keeps the flame visible from a seated position without radiating too much heat at knee level. Sitting-height pits, built taller at 18 to 20 inches, are a deliberate design choice when the plan includes built-in edge seating around the rim itself.
| Pit Diameter | Best For | Typical Seating | Notes |
|---|---|---|---|
| 24–30 in | Small patios, balconies | 2–4 people | Often portable; easy to relocate |
| 36–44 in | Most backyards | 4–6 people | Most versatile, family-friendly range |
| 48–60+ in | Large patios, entertaining | 6+ people | Usually built-in; larger safety zone required |
Pro Tip: Before deciding on a diameter, sit in a chair at the distance you’d actually place it and have someone hold a broom handle upright where the pit’s edge would be. It sounds silly, but it’s the fastest way to feel whether a size is right without building anything.
Planning Your Patio Around the Fire Pit
A fire pit doesn’t exist in isolation. It exists inside a patio, and the two need to be sized together or you end up with either a cramped gathering spot or a slab that dwarfs its centerpiece.
The most useful rule of thumb here is what landscape designers call the one-third rule: the fire pit plus its safety buffer should take up no more than about a third of your total patio area. Go past that and there’s no room left for seating or walking without stepping over the safety line.
Here’s how that plays out with common patio sizes:
- 10x10 patio (100 sq ft): Pairs best with a 24 to 30 inch portable pit and 2 to 4 chairs pulled in close.
- 12x12 patio (144 sq ft): Comfortably handles a 36 inch pit with a full seating arrangement for 4 to 6, which is why this size shows up so often in requests for medium pits.
- 16x16 patio (256 sq ft): Opens the door to a 44 to 48 inch pit, built-in seating walls, and still leaves circulation room for guests to move freely.
Seating distance itself follows a fairly narrow band. Plan for roughly 24 to 48 inches between the flame and each seated guest for warmth without scorching anyone’s shins, and leave adequate clearance behind the chairs so people can walk past without squeezing through. Sizing must always be judged relative to the patio it sits in, since a 36 inch pit reads completely differently on a cramped 10x10 slab than it does on a spacious 16x16 one.
The cheapest way to test any layout is to mark it. Lay a garden hose or rope in a circle for the pit, chalk out the safety buffer, and physically place your patio chairs where they’d go to test spacing. If you’re building a patio surface specifically to support this layout, our guide to installing a fire pit on a patio walks through base prep and surface choices, and tighter lots can borrow ideas from these small backyard patio layouts that squeeze real seating into limited square footage.
Clearance and Setback Distances You Can’t Skip
Sizing a fire pit for comfort is only half the job. Sizing it for safety is the half that keeps insurance adjusters and fire departments out of your life.
Horizontal setback from structures is the big one. Planning guidance built around NFPA principles typically recommends 10 to 25 feet between a wood-burning pit and any structure, including your house, fence, and detached garage. Gas pits are more forgiving. Because they burn without throwing embers, gas installations generally require less clearance, often around 5 to 10 feet, but follow local code and manufacturer specs, though your specific unit’s manufacturer specs and local code amendments always take priority over a general rule.
Beyond structures, leave a 3 to 4 foot buffer between the pit’s outer edge and the nearest seating. This isn’t the same as the seating distance discussed earlier. It’s a hard boundary that keeps furniture legs, blankets, and kids’ feet out of radiant heat range.
Vertical clearance gets overlooked constantly. Pergolas, covered patios, and tree canopies all need roughly 8 to 10 feet of clear space above an open flame. Gas fire pits still require this vertical buffer even though their horizontal footprint is smaller, so don’t assume a compact gas unit lets you tuck it under a low overhang.
Ground surface matters just as much as air space. Combustible mulch, dried grass, and ornamental grasses within about 3 feet of the pit should be swapped for gravel, pavers, or stone to cut down on ember-driven ignition. Keep a metal bucket, hose, or extinguisher within reach every time the pit is lit, and consult the USFA’s outdoor fire prevention guidance before your first burn if you’ve never operated an open flame at home.
Permits enter the picture once you move past a portable steel bowl. Built-in masonry pits and any gas line installation commonly trigger a permit and sometimes an inspection, while a portable pits usually do not require permits. Call your local building department before pouring concrete or running gas line, not after.
How Fire Pit Type and Material Affect Real-World Size
The number stamped on a fire pit’s box isn’t always the number that matters for your layout. A 36 inch steel bowl and a 36 inch built-in stone surround take up wildly different amounts of real patio space once you account for the seat wall, the coping, and the base.
A few distinctions worth knowing before you shop:
- Bowl diameter versus table footprint. A fire pit table might list a 30 inch burn area but have a 48 inch outer table edge, which changes how much patio room it actually consumes.
- Material heat tolerance. Steel and cast concrete tolerate direct heat well; natural stone and certain pavers can discolor or crack over years of thermal cycling, which affects what you build the surrounding surface from.
- Portable versus built-in. Portable units give you flexibility to reposition or store them, while built-ins demand a larger permanent safety margin and, as covered above, often a permit.
If you’re deciding between paver and poured surfaces for the surrounding patio, our comparison of pavers versus concrete patios breaks down how each holds up under repeated heat exposure near a fire feature.
The On-Site Checklist Before You Buy or Build
Every measurement on a chart is a starting point. The only way to know if it actually works is to test it on your own ground.
- Mark the center point where you want the pit, then spray-paint or tape out the full diameter plus your safety buffer.
- Place actual patio chairs around the marked circle and sit in them to test seating distance and circulation.
- Confirm local code and HOA rules before ordering materials, especially for anything built-in or gas-fed.
- Verify manufacturer clearances for your specific unit rather than relying on general ranges alone.
- Plan your base and fuel storage, including non-combustible ground material and a safe spot for wood or a propane tank.
This exact sequence, marking the footprint before committing to materials, is what professional installers use to avoid the rework that comes from guessing at dimensions on paper.
Pro Tip: If your plan involves a gas line, masonry seat walls, or a patio built on a slope, that’s the point to call in a professional rather than push through it solo. Drainage mistakes under a fire pit base are expensive to fix after the fact, and gas work usually needs a licensed hand regardless of your DIY skills.
When a Permanent Fire Pit Calls for a Professional Build
Portable pits are forgiving. Permanent ones aren’t, and that’s exactly where a design-build team earns its keep.
GC Signature Outdoors LLC handles the parts of a fire pit project that go wrong most often when tackled alone:
- Design-build patios sized correctly around the pit from day one, not retrofitted after the fact.
- Permanent fire pit construction using masonry and materials built to handle years of heat cycling.
- Paver patio installation that accounts for drainage slope, an easy detail to miss on a DIY pour.
- Guidance through local permitting for gas hookups and built-in structures.
If your site has a slope, a gas line to run, or a patio that needs to serve double duty as an entertaining space, that complexity is exactly what a professional install resolves before it becomes a costly fix.
Don’t Forget Maintenance Space When You’re Sizing the Pit
The space a fire pit needs doesn’t stop at the safety buffer. It also needs room for upkeep, and skipping that in your layout is a mistake that shows up months later.
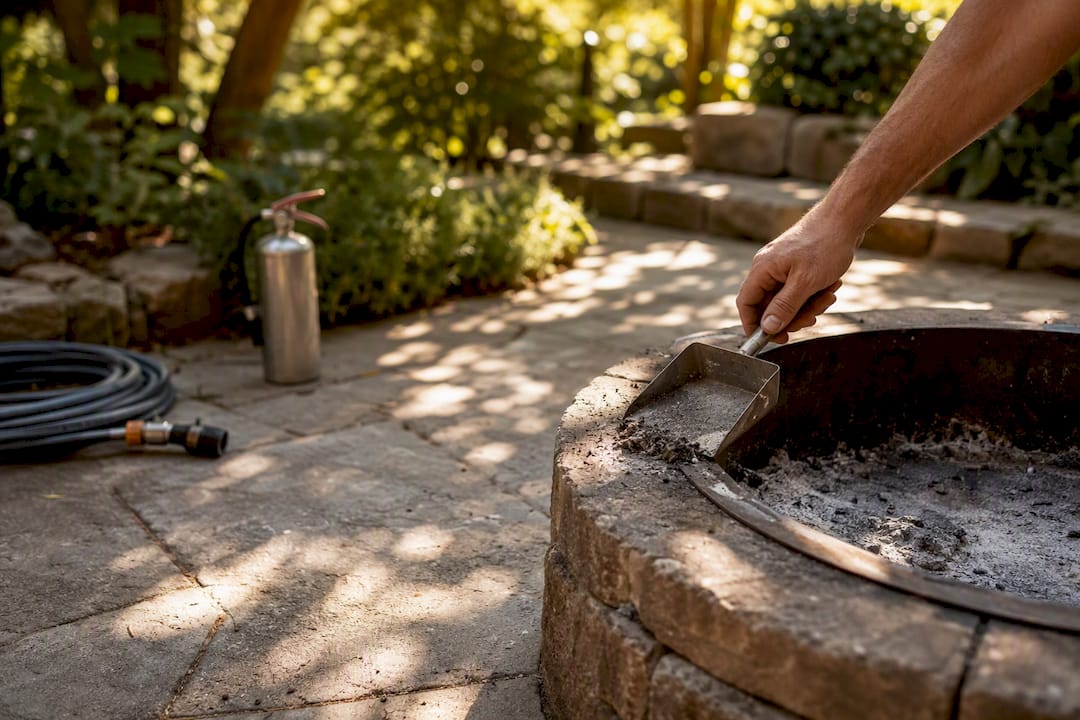
Wood-burning pits generate ash that has to be scooped and disposed of safely, which means you need a clear approach path to the pit that isn’t blocked by furniture or planters. Gas pits need periodic access to the burner and, if it’s a buried tank setup, occasional access to the fuel line connection point. Cramming a pit into a tight corner might look fine in the showroom photo, but if you can’t kneel beside it to clean it out, that tight fit turns into a chore you avoid.
Built-in masonry pits add another layer: stone and concrete surfaces near open flame benefit from occasional resealing or resurfacing, especially in climates with freeze-thaw cycles. That work needs staging room, somewhere to set tools and materials temporarily without disturbing seating or landscaping nearby.
A practical habit is to leave at least one open access point around the pit, roughly the width of a standard walkway, that stays free of chairs and decor. Think of it the same way you’d think about clearance behind kitchen appliances: the pit works fine without it, but maintenance becomes a hassle every single time. Homeowners who build this access in from the start rarely regret the extra few feet it costs them in patio space.
Field Tips From Our Crews: Common Pitfalls and Easy Upgrades
The mistakes we see most often at install time aren’t about picking the wrong diameter. They’re about skipping the marking step, assuming circulation space will “work itself out,” or edging the pit with mulch that has to be pulled back every time it’s lit.
The fixes are just as simple. Slope the base slightly for drainage so water doesn’t pool under the pit after a storm. Use a metal ring insert to protect masonry from direct heat over time. Choose gravel or paver edging instead of bark mulch, and decide where wood or tools get stored before the project is finished, not after.
We’ve watched more than one backyard fire pit go from an afterthought to the most-used space on the property once the layout actually matched how the family gathers around it.
— GC Signature Outdoors LLC
Ready to Build a Fire Pit That Fits Your Yard, Not a Chart
Sizing charts get you close. A site visit gets you exact, because your slope, your patio material, and your gas line access all change what “the right size” actually means for your specific yard.

GC Signature Outdoors LLC builds permanent fire pits and the patios around them as one connected project, so you’re not stuck retrofitting a slab that was never sized for a fire feature in the first place. That means correct drainage slope from day one, masonry that holds up under repeated heat cycling, and permit navigation handled before the first stone is set. Browse completed paver patio and outdoor living projects to see real fire pit and seating layouts built for KC Northland yards, or if you’re planning the surrounding hardscape first, our concrete patio services cover the foundation work that supports it. Request a site visit and we’ll measure your actual space, not a generic chart, before recommending a size.
Sources
- National Fire Protection Association (NFPA)
- USFA/FEMA prevention: outdoor fires
- Fire Pit Patio Design Guide - Layout, Safety & Stone Selection | Hardscape Genius
- Outdoor Fire Pit Setup Done Right: Codes, Safety, and Design | Build-Construct
FAQ
Is a 24 Inch Fire Pit Too Small?
Not for a small patio or a couple entertaining 2 to 4 people. A 24 inch pit concentrates heat efficiently and works well on patios under about 100 square feet, though it will feel undersized for larger groups or bigger patios.
What Size Fire Pit Fits a 12x12 Patio?
A 12x12 patio (144 square feet) comfortably supports a 36 inch fire pit with seating for 4 to 6 people, which is exactly why this range is called out as the most versatile size for typical backyards.
How Big Is a 32 Inch Fire Pit?
A 24 to 30 inch fire pit fits small patios around 100 square feet and seats 2 to 4 people. It suits smaller patio areas without needing the full clearance buffer a larger pit requires.
How Big Is a 42 Inch Fire Pit?
A fire pit within the 36 to 44 inch medium range seats 4 to 6 people and works well on a 12x12 or larger patio with proper clearance.
How Do I Know What Clearance My Fire Pit Needs?
Check manufacturer’s specs and local codes for clearance requirements as they take precedence over general rules. As a planning baseline, wood-burning pits generally need 10 to 25 feet from structures while gas units often need less.
Should I Hire a Professional for a Permanent Fire Pit?
Yes, if your project involves a gas line, masonry construction, or sloped drainage. GC Signature Outdoors LLC handles design-build fire pits and patios where site conditions or code navigation go beyond a DIY portable install.
Recommended
- Yes, You Can Put a Fire Pit on a Patio (Here’s How) | GC Signature Outdoors
- Small Backyard Patio Ideas That Maximize Every Inch | GC Signature Outdoors
- Outdoor Kitchen Layout: A Practical Planning Guide | GC Signature Outdoors
- Walkway Width Guide: Recommended Sizes for Every Use | GC Signature Outdoors
Ready to get started in Kansas City's Northland?
GC Signature Outdoors serves Smithville, Platte City, Kearney, Liberty, and surrounding areas.