
Homeowners' 3 Step Test: Tie In or Replace a Concrete Patio Extension
- Broom-finish flatwork per sq ft
- $8–$15
- Stamped / colored concrete per sq ft
- $15–$25
- Typical 2-car driveway replacement
- $6,000–$13,000
Homeowners’ 3 Step Test: Tie In or Replace a Concrete Patio Extension
If your existing slab sits level with no active cracks or heave, doweling a new pour into the old edge and matching the base is usually the smartest concrete patio extension method. If the slab is shifting, skip the tie-in. An isolated section or, in worse cases, a full repour is recommended when the original slab is unstable, since standard dowel practice only holds up when the original slab is stable.
TL;DR:
- A dowel tie-in works only if the existing slab is level, crack-free, and stable, whereas unstable slabs require a full removal and new pour.
- Proper preparation includes excavating to the same depth, using a gravel base, setting forms with the correct slope, and placing reinforcement on sturdy chairs.
- Matching the finish is challenging, with weathering reducing color and texture differences over time; resurfacing can create a more uniform look but costs more initially.
- Use expansion joints for structural separation, dowels to transfer load, and control joints to prevent cracking, ensuring proper spacing and placement are essential.
- Hire a professional if access is tight, the slab shows instability, or finish details are complex; request a detailed, itemized bid for accurate comparison.
Table of Contents
- Which Concrete Patio Extension Method Fits Your Slab?
- How to Build a Concrete Patio Extension Step by Step
- Expansion Joints, Dowels, or Keyed Ties: What Actually Prevents Cracking
- Keeping Water Moving Across Old and New Concrete
- Matching the Finish Without Faking It
- DIY or Hire a Pro? What to Ask Before You Sign a Bid
- What Years of Local Pours Have Taught Us
- Get a Straight Answer on Your Patio Extension
- Sources
- FAQ
Which Concrete Patio Extension Method Fits Your Slab?
Before picking a method, get on your knees at the edge of the slab with a 4-foot level. Check three things: is it flat, are there active cracks that have moved recently (look for offset edges, not just hairline surface checking), and is any section heaved up from tree roots or frost.
That inspection tells you which path applies:
- Dowel tie-in: existing slab is stable, level, and crack-free at the edge. This is the standard method for extending concrete patio square footage without a visible seam.
- Isolated expansion joint: slab is mostly sound but you want the new section to move independently, or you’re unsure about long-term stability.
- Full repour: the existing slab has heave, structural cracking, or a failed base. Tying in here just relocates the problem.
- Overlay/resurface: both slabs are structurally fine but look mismatched; a resurfacing product ties the whole patio together visually.
- Non-concrete alternative: irregular shapes, tight budgets, or awkward transitions often work better with pavers or a mixed-material approach.
Hire a pro when you’re dealing with limited truck or pump access, HOA approval or permit requirements, or a finish (stamped, stained, exposed aggregate) that needs to match exactly.
How to Build a Concrete Patio Extension Step by Step
Whether you’re pouring it yourself or reading a contractor’s bid line by line, the sequence matters more than any single step.
- Plan the layout. Measure the addition, call 811 to mark utilities, check whether your municipality or HOA requires a permit for concrete flatwork, and confirm the truck or pump can actually reach the pour area.
- Excavate and prep the base. Dig to match the depth of your existing slab’s base, typically 4 to 6 inches, then place and compact gravel in lifts. This is where corners get cut, and it’s also where problems show up two winters later, since an extension still needs the same grading and gravel base as a brand-new patio.
- Set forms and match height. Run a string line or laser level off the existing slab surface. Set new forms slightly high rather than low. A slightly high edge can be ground down; a low edge holds water permanently.
- Place reinforcement. Set wire mesh or rebar on chairs so it sits mid-slab, not on the ground. If you’re doweling, drill into the old slab’s edge and epoxy dowels in before you place steel.
- Pour and consolidate. Place concrete, work it into corners and against the old edge, and avoid overworking the surface, which pulls aggregate down and weakens the top layer.
- Cut control joints and finish. Place control joints in the new section at consistent intervals, generally matching the spacing on the original slab, and finish the surface to blend as closely as possible with the existing texture.
- Cure and protect. Cover fresh concrete and keep traffic off it for at least a week; moisture curing for the first 3 to 7 days determines a big share of the slab’s long-term strength.
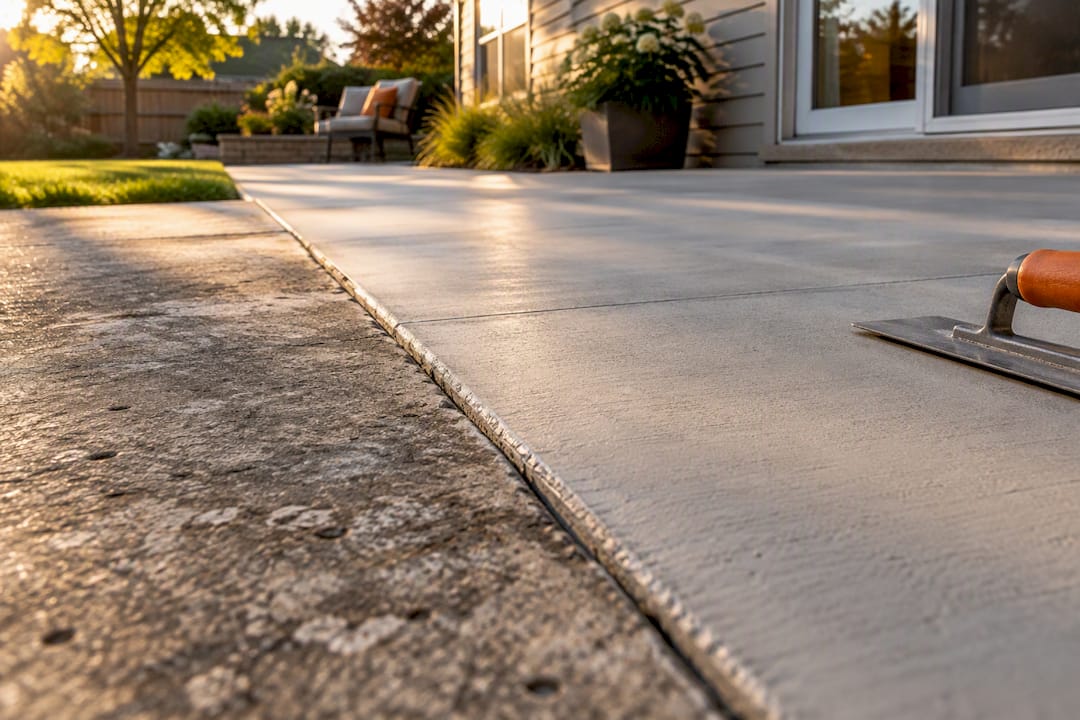
Getting the interface right during the pour is where seams either disappear or become permanent eyesores. The cleanest results come from cleaning and lightly roughening the old edge, running dowels or your joint plan exactly as designed, and finishing carefully near the seam without washing out the bond.
Running short mid-pour forces a cold joint exactly where you least want one, right at the edge tying into your old slab.*
Expansion Joints, Dowels, or Keyed Ties: What Actually Prevents Cracking
Pick the wrong edge detail and you’ll get a crack in the exact spot you were trying to avoid. The rule of thumb is simple once you know what each detail is for:
- Expansion (isolation) joints let the new and old slabs move independently, which matters wherever a patio meets a foundation, steps, or another rigid structure. Use a half-inch joint material running the full depth of the slab.
- Dowel bars transfer load and keep both slabs level with each other, which is what you want when the addition should function as one continuous patio surface.
- Keyed interfaces align the new pour with the old slab’s edge profile, mostly useful when height matching is tight and you need a mechanical lock beyond dowels alone.
- Control joints inside the new section itself should land at the same intervals as the original slab’s joints. Skipping them, or spacing them too wide, is one of the most common reasons a “seamless” extension develops a random crack six months in.
Keeping Water Moving Across Old and New Concrete
Lay a straightedge or level across the existing slab to find its slope before you set a single form. Most patios carry a quarter inch of drop per foot away from the house. Your new section has to continue that same fall, not create its own.
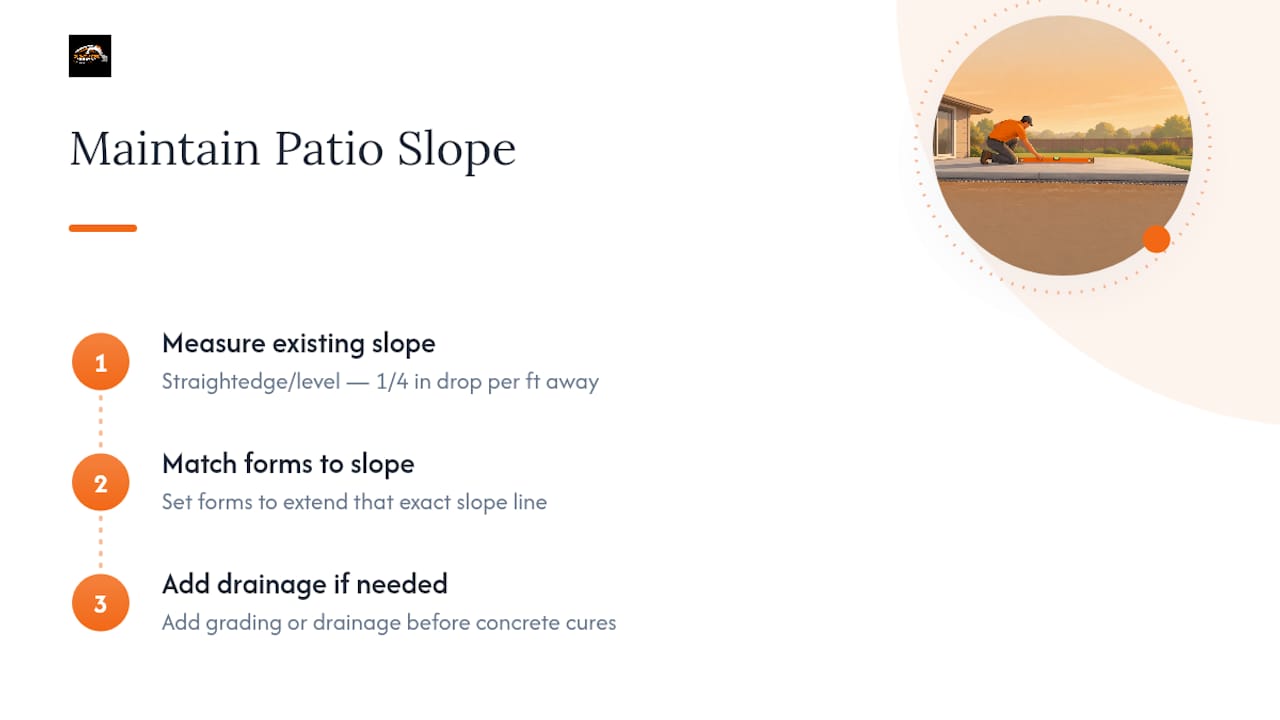
Set your forms to extend that exact slope line rather than eyeballing it from the new section alone. If the yard beyond the patio doesn’t drain well, this is the moment to add a grading fix or drainage feature, not after the concrete cures and standing water shows up at the seam.
Matching the Finish Without Faking It
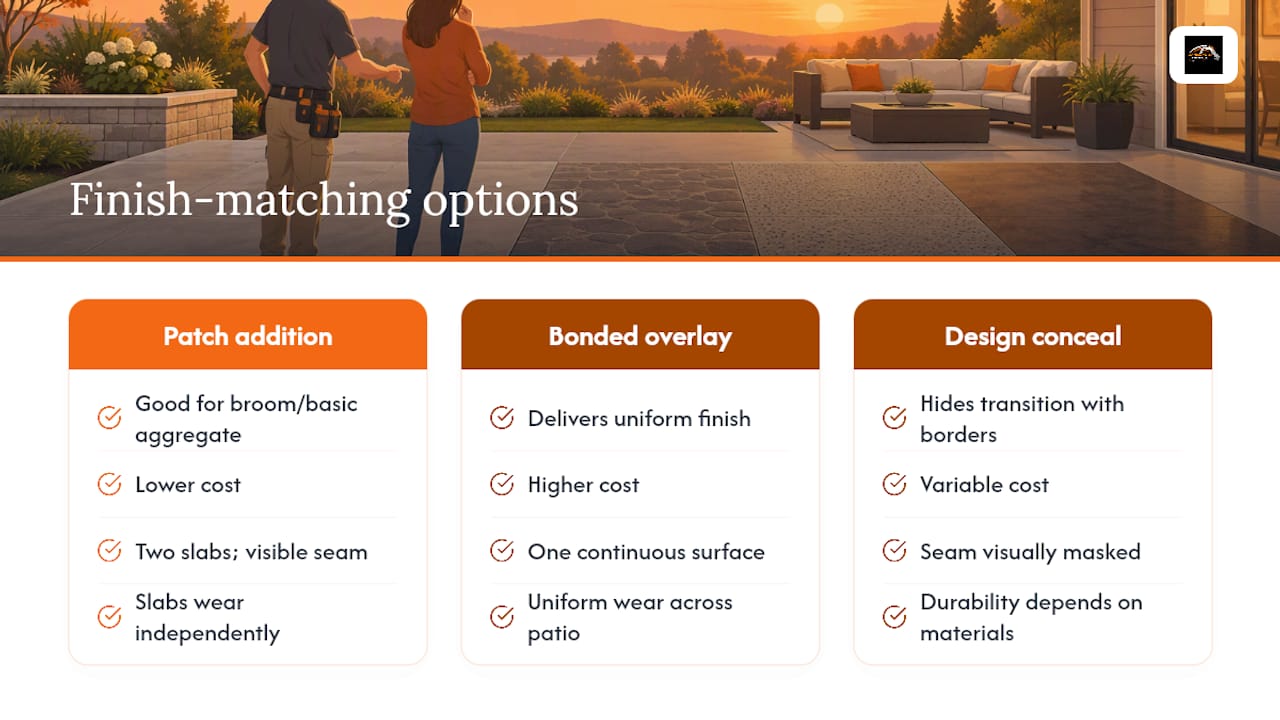
New concrete cures lighter and smoother than old concrete that’s spent years outside. Weathering typically closes most of that color gap within one to two seasons, though it rarely disappears completely.
Texture matching works reasonably well for broom finishes and basic aggregate, but stamped patterns and integral color are much harder to replicate exactly, since dye lots and stamp tools vary. If the mismatch bothers you more than a subtle seam would, resurfacing the entire patio with a bonded overlay is the more honest fix. It costs more than patching a small addition but delivers one continuous, uniform surface instead of two slabs wearing a compromise. For layout ideas that hide transitions, mixed materials or planter borders at the seam line can help too.
DIY or Hire a Pro? What to Ask Before You Sign a Bid
Hire a contractor when access is tight, the existing slab shows any instability, the finish involves stamping or color matching, or permit paperwork is required. A DIYer with a wheelbarrow and a weekend can handle a small, simple slab; none of that applies once a pump truck or engineered fix enters the picture.
Whoever pours it, ask every bid to itemize the same things:
- Base compaction method and depth
- Edge detail: dowels, keyed tie, or isolation joint, spelled out by name
- Reinforcement type and placement
- Concrete quantity and delivery or pump access charges
- Site access, setup, and cleanup
- Timeline, including cure time before use
- Certificate of insurance and written warranty terms
A transparent bid separates fixed costs like delivery and access from variable costs like square footage, which is exactly what lets you compare two contractors fairly instead of guessing why one number is higher.
What Years of Local Pours Have Taught Us
The failures we see most often trace back to two shortcuts: skipping proper base compaction and skipping dowels on a tie-in that needed them. Soft edges, pump access on tight lots, and compaction gaps show up in nearly every problem call we get. An honest estimate names these risks up front instead of promising a seamless result on a slab that was never a good candidate for tying in.
— GC Signature Outdoors LLC
Get a Straight Answer on Your Patio Extension
Concrete flatwork, drainage grading, and outdoor living builds are sometimes handled by the same crew, so you may avoid juggling multiple contractors on the same project.

An estimate starts with the same slab inspection covered above: we check level, look for active cracks, and tell you honestly whether a dowel tie-in will hold or whether you need an isolated section instead. That’s the difference between a five-year fix and a five-month one. If your extension is really the first phase of a bigger backyard plan, considering a Double Garden Pergola With Decking adds stylish function and flow to your new outdoor living area. For the concrete itself, see our patio and driveway flatwork services and request a written estimate with every line item spelled out, base work, edge detail, and finish, before you decide DIY or hire out.
Sources
- Pour new concrete next to existing: joints & bonding guide — SlabCalc
- Concrete patio cost — HomeGuide
- Concrete patio addition/extension cost calculator — Concrete Estimator Hub
FAQ
How Much Does It Cost to Extend a Concrete Patio?
Costs depend heavily on access, base condition, and finish, but extensions often run close to new-patio pricing per square foot since the same grading and gravel base work is required. For a full breakdown of local pricing factors, GC Signature Outdoors LLC’s Kansas City area cost guide walks through the main variables.
What Is the Cheapest Way to Extend My Patio?
A simple broom-finished slab poured directly against a stable existing edge with a basic dowel tie-in is typically the least expensive route, since it avoids stamped or colored finish costs. Mixed-material options like gravel or pavers bridging an odd shape can cost less than matching concrete exactly, especially on small or irregular additions.
How Much Would a 20x20 Concrete Patio Extension Cost?
Additions above a certain size allow fixed costs like delivery minimums and setup fees to be spread more thinly, unlike smaller additions where those same fixed costs raise the effective per-square-foot price. Get a written, itemized quote rather than relying on a rough size-based estimate, since base condition and access swing the number significantly.
How Do You Extend an Existing Covered Patio?
Extending under an existing roof means working around support posts and header height, so the new slab usually still needs its own base and either a dowel tie-in or isolation joint depending on whether the covered structure and the new section will move together. Confirm the roof structure’s footing depth first, since altering grade near an existing foundation post requires extra care.
Do I Need Dowels or an Expansion Joint for My Extension?
Use dowels when you want the new and old slabs to function as one level surface and load transfer matters; use an isolation joint when you want each section to move independently. A half-inch expansion joint material run through the full slab depth is the standard spec for the isolation option.
Recommended
Ready to get started in Kansas City's Northland?
GC Signature Outdoors serves Smithville, Platte City, Kearney, Liberty, and surrounding areas.