
How to Manage Cold Weather Concrete Curing the Right Way
- Broom-finish flatwork per sq ft
- $8–$15
- Stamped / colored concrete per sq ft
- $15–$25
- Typical 2-car driveway replacement
- $6,000–$13,000
How to Manage Cold Weather Concrete Curing the Right Way
Protect fresh concrete from freezing until it reaches roughly 500 psi (3.5 MPa), and keep in-place temperatures at 50°F or higher for at least the first 48 hours. That single rule drives every decision on a winter pour.
Here’s what to do the moment the forecast turns cold:
- Cover fresh concrete with insulating blankets or set up a heated enclosure before temperatures drop overnight.
- Insert temperature probes at corners and thin edges, then log readings at least twice daily.
- Extend protection if logged temperatures lag behind target, even if the surface looks set.
- Verify actual in-place strength with maturity testing or field-cured cylinders before pulling protection, never by eyeballing the surface.
A poured slab that looks hard on day one can still be far short of 500 psi underneath. Cold weather concrete curing isn’t about waiting out the weather. It’s about actively managing heat until the chemistry finishes its job.
Key Takeaways
Cold weather concrete curing succeeds when crews prevent freezing until concrete reaches 500 psi and verify that strength with maturity testing or field cylinders rather than appearance alone.
| Point | Details |
|---|---|
| Hit 500 psi before freeze exposure | Concrete frozen before this threshold suffers permanent, unrepairable damage to its pore structure. |
| Know the ACI thresholds | Cold weather is defined below 40°F average; maintain concrete at 50°F or higher for 48 hours. |
| Match protection to conditions | Use blankets for typical residential pours, heated enclosures below the 20s, and never unvented combustion heaters. |
| Verify, don’t guess | Maturity testing (—) or field cylinders (ASTM C31) confirm real strength before removing protection. |
| Plan for cost and schedule | Winter pours run 60% to 80% longer to cure at 50°F than at 70°F, and protection materials add real budget line items. |
| Work with a crew that plans ahead | GC Signature Outdoors LLC builds winter driveway and patio pours around logged temperature monitoring and maturity verification. |
Standards and Resources Worth Keeping on Hand
- ACI 306R-16, Guide to Cold Weather Concreting is the primary reference for protection periods, temperature tables, and approved methods.
- ASTM C1064/C1064M covers temperature measurement of fresh concrete; ASTM C31 governs field-cured cylinder practice.
- Supplier technical sheets on insulating blankets and heater ventilation safety, like CEMSTONE’s cold weather concrete guidance, fill in practical deployment details ACI leaves general.
Table of Contents
- Why Cold Weather Stalls Hydration and Risks Permanent Damage
- What Temperature Actually Defines Cold Weather Concreting?
- Choosing the Right Protection System for the Job
- Should You Adjust the Mix for Cold Weather Pours?
- Planning the Pour: Subgrade, Monitoring, and Verification
- Finishing Choices and the Mistakes That Cost You Later
- What to Do When Protection Fails Mid-Pour
- Does Cold Weather Curing Have an Environmental Upside?
- Staying Safe Around Heated Enclosures and Cold-Weather Admixtures
- What Does Cold Weather Curing Add to Your Budget?
- Sources
- FAQ
Why Cold Weather Stalls Hydration and Risks Permanent Damage
Concrete gains strength through hydration, the chemical reaction between cement and water that generates its own heat. Drop the surrounding temperature and that reaction slows dramatically. Drop it far enough, and the water inside the mix freezes before hydration ever gets going.
Ice crystals forming in fresh paste do something water curing at normal temperatures never risks: they physically expand and disrupt the pore structure before it has any strength to resist. That damage is permanent. No amount of later warmth repairs it.
Concrete protected from freezing until it reaches approximately 500 psi (3.5 MPa) will not be damaged by a single freezing cycle, according to ACI 306R-16, the industry’s core reference for cold weather concreting.
That’s why surface hardness is such an unreliable proxy for readiness. A slab can feel firm to a boot heel while the paste just below the surface still sits well under threshold, especially at edges and thin sections that lose heat fastest.
What Temperature Actually Defines Cold Weather Concreting?
ACI 306R-16 defines cold weather as any period when the average daily outdoor temperature stays below 40°F for three consecutive days. That’s the trigger for formal protection measures, not a single frosty morning.
Freezing risk becomes acute once air temperature hits 32°F, but the real danger zone starts well above that if the concrete itself isn’t holding heat. A few field-tested thresholds worth keeping on a clipboard:
- Maintain concrete temperature at 50°F or above for the first 48 hours on typical residential flatwork.
- Thin sections, exposed edges, and corners need longer protection than thick interior mass because they lose heat faster.
- Below 40°F ambient, plan on active heating, not just insulation, per CEMSTONE’s cold weather guidance.
- Never treat a single mild afternoon as clearance to skip protection if overnight lows are still dropping toward freezing.
Choosing the Right Protection System for the Job
Picking a protection method is really a question of scale, budget, and how much margin for error the pour demands. Here’s how to think through it:
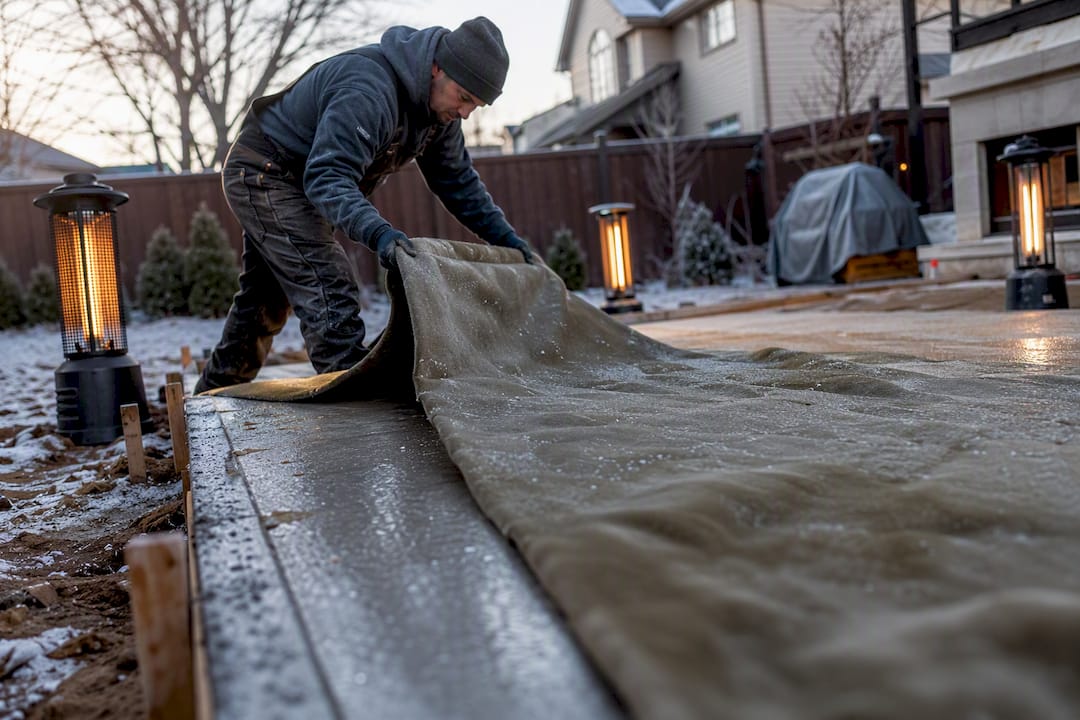
- Insulating blankets work for most residential driveways and patios. Choose moisture-impervious blankets with a reflective inner layer, and size them generously so they overlap edges and corners, the parts that cool fastest and fail first.
- Heated enclosures step in when ambient temps drop into the 20s or lower, or when a job can’t tolerate any schedule slip. Tarps or rigid framing form the shell; hydronic or electric heaters supply the warmth. Never use unvented combustion heaters, because carbon dioxide from combustion causes surface carbonation and weak, dusting slabs.
- Electric curing mats and embedded heat cable suit critical pours, structural elements, or spots where blankets alone can’t hold heat, like an exposed retaining wall footing poured in January.
- Combined systems make sense below roughly 30°F: blankets over an enclosure, or heat cable under blankets, to buy an extra safety margin without running heaters at full blast all night.
Wind is the enemy of every one of these methods. Stake blanket edges, weight them at seams, and check ties again after any gust event, because a blanket that’s blown open at 2 a.m. does nothing for the six hours it takes someone to notice.
Pro Tip: Keep an infrared thermometer in the truck. A quick surface scan under the blanket edge tells you in seconds whether a corner is losing heat faster than the rest of the slab, long before a logged sensor reading would flag it.
Should You Adjust the Mix for Cold Weather Pours?
Mix adjustments buy time; they don’t replace protection. That distinction trips up more crews than any other part of cold weather concrete curing.
Non-chloride accelerators speed early strength gain without the corrosion risk that calcium chloride carries near reinforcing steel, rebar dowels, or metal embeds. Calcium chloride still shows up on unreinforced flatwork, but most specifiers now steer away from it wherever steel is present, given the long-term durability trade-off.
A few other practical adjustments:
- Warming mix water and aggregates to a moderate range speeds early hydration, but avoid overheating, which can cause flash set or uneven curing.
- High-early-strength cement types get you to 500 psi faster, but they’re a supplement to protection, not a substitute for blankets or heat.
- Confirm any accelerator with the ready-mix supplier or project specifier before the truck arrives. Approved admixture lists vary by mix design and by job.
Planning the Pour: Subgrade, Monitoring, and Verification
Winter pours succeed or fail based on decisions made before the truck shows up. Frozen subgrade is the most common and most avoidable mistake on residential jobs. Placing concrete over frozen ground causes uneven thaw settlement later, cracking a slab that was otherwise perfectly cured.
Follow this sequence on any pour below 40°F:
- Confirm subgrade is fully thawed to the specified depth, not just thawed at the surface. Use ground heaters or insulated covers overnight if frost has set in.
- Place temperature sensors at corners, edges, and one representative interior point, since these areas cure at different rates.
- Log readings at consistent intervals, morning and evening at minimum, and keep a written record tied to the pour date and location.
- Choose a verification method before protection comes off.
A written cold-weather protection plan should specify the protection method, monitoring schedule, and a contingency step for heater failure, so nobody is improvising at 11 p.m. in a snowstorm.
Finishing Choices and the Mistakes That Cost You Later
Water curing, whether by ponding or wet burlap, is a bad idea in cold weather because standing water freezes and undoes exactly the protection you just built. Membrane-forming curing compounds or sealed insulating blankets hold moisture in without introducing a freeze risk.
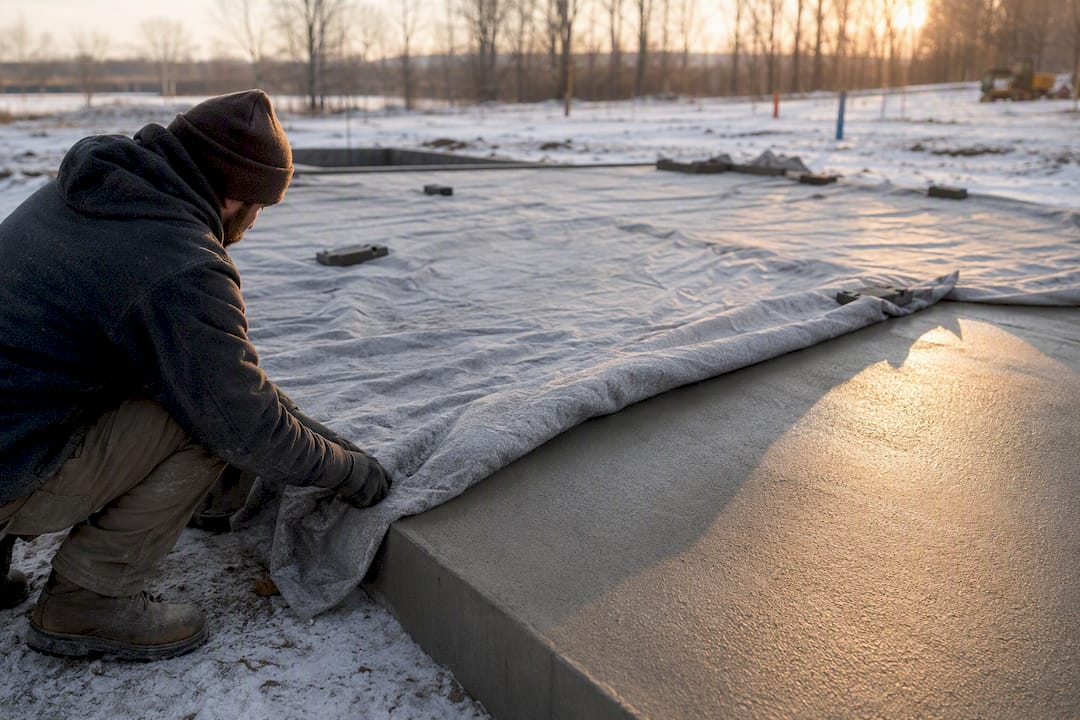
When it’s time to pull protection, do it gradually. Dropping surface temperature more than roughly 20°F to 40°F in a short window can induce thermal cracking, even after the slab has cleared 500 psi. Stage the removal over a day, ideally when overnight lows aren’t diving again.
Three mistakes account for most winter concrete failures:
- Pouring on frozen or partially frozen subgrade instead of confirming full thaw depth first.
- Running unvented combustion heaters inside an enclosure, weakening the surface through carbonation.
- Judging readiness by how the slab looks or feels instead of a logged temperature history or a maturity/cylinder result.
Pro Tip: Photograph your temperature log sheet and texts them to the client the same day you pour. It headed off more than one “why does my driveway look different” call.
What to Do When Protection Fails Mid-Pour
If a heater dies overnight, add blanket layers immediately, move a portable heater into the gap, and check temperature readings as soon as you arrive on site. Extend the protection window by at least the time lost.
Steps in priority order:
- Stop and assess: pull the temperature log first, not the tarp.
- If rain or freezing rain hit during initial set, remove standing water immediately and inspect for surface washout before re-covering with a dry, waterproof layer.
- If sensor data suggests the slab may have frozen before reaching 500 psi, stop work, document everything with photos and logs, and consult a structural engineer before finishing or loading the element.
Does Cold Weather Curing Have an Environmental Upside?
Cold weather protection carries a real energy cost, propane or electric heaters running for days add up, but it also prevents a bigger environmental problem: replacing failed concrete.
A slab that freezes before reaching adequate strength often needs demolition and a full repour, doubling the cement production, aggregate hauling, and embodied carbon tied to that section of driveway or patio. Cement manufacturing is one of the more carbon-intensive steps in any concrete project, so avoiding a second pour is the single biggest sustainability win available on a winter job.
There are smaller levers, too. Electric curing mats and hydronic heaters use energy more efficiently than open-flame propane heaters, and they avoid combustion byproducts entirely. Insulating blankets, meanwhile, are reusable across dozens of jobs, which spreads their manufacturing footprint over a long service life rather than treating them as disposable.
Interestingly, properly protected cold-weather concrete sometimes reaches higher ultimate strength than a similar warm-weather pour, because slower hydration tends to build a denser microstructure. That density can translate into a longer service life and fewer repair cycles down the road, which is its own kind of sustainability benefit even if it rarely gets discussed that way.
Choosing electric mats over combustion heaters where the budget allows, sizing enclosures to avoid running heaters harder than necessary, and getting the protection right the first time all reduce the environmental cost of a winter pour more than any single material choice.
Staying Safe Around Heated Enclosures and Cold-Weather Admixtures
Heated enclosures introduce hazards that a summer pour never involves, and crews need to treat them with the same seriousness as any confined-space or combustion-adjacent work.
Ventilation is the first concern. Unvented combustion heaters release carbon monoxide and carbon dioxide, both a health hazard for anyone working inside the enclosure and a threat to the concrete itself through early carbonation. Anyone entering a heated enclosure should treat it the way they’d treat any space with a fuel-burning appliance: fresh air exchange, a working carbon monoxide detector, and clear entry and exit points.
Hydronic heaters carry burn and scald risks from hot glycol lines, and electric curing mats can pose shock hazards if they’re damaged or improperly grounded. Inspect cords, connections, and mat surfaces before each use, and never run electric equipment through standing water or wet ground.
Admixtures bring their own handling rules. Accelerators and other cold-weather additives are chemical products, and gloves and eye protection belong on hand any time crews are dosing or handling them at the batch plant or on site. Calcium chloride in particular is corrosive to skin and can react with other jobsite chemicals, which is one more reason most crews near reinforcing steel skip it in favor of non-chloride accelerators.
Cold itself is a hazard too. Standard winter jobsite precautions, layered clothing, warm-up breaks, traction on icy surfaces around fresh pours, apply on top of everything specific to heated enclosures and admixture handling.
What Does Cold Weather Curing Add to Your Budget?
Winter protection isn’t free, and pretending otherwise leads to underbid jobs. Insulating blankets are the cheapest line item and often pay for themselves across multiple projects since they’re reusable season after season.
Heated enclosures cost considerably more, factoring in enclosure materials, heater rental or fuel, and the labor to build and monitor them. Electric curing mats sit in the middle: higher upfront cost than blankets, but no fuel expense and less labor to manage once they’re placed.
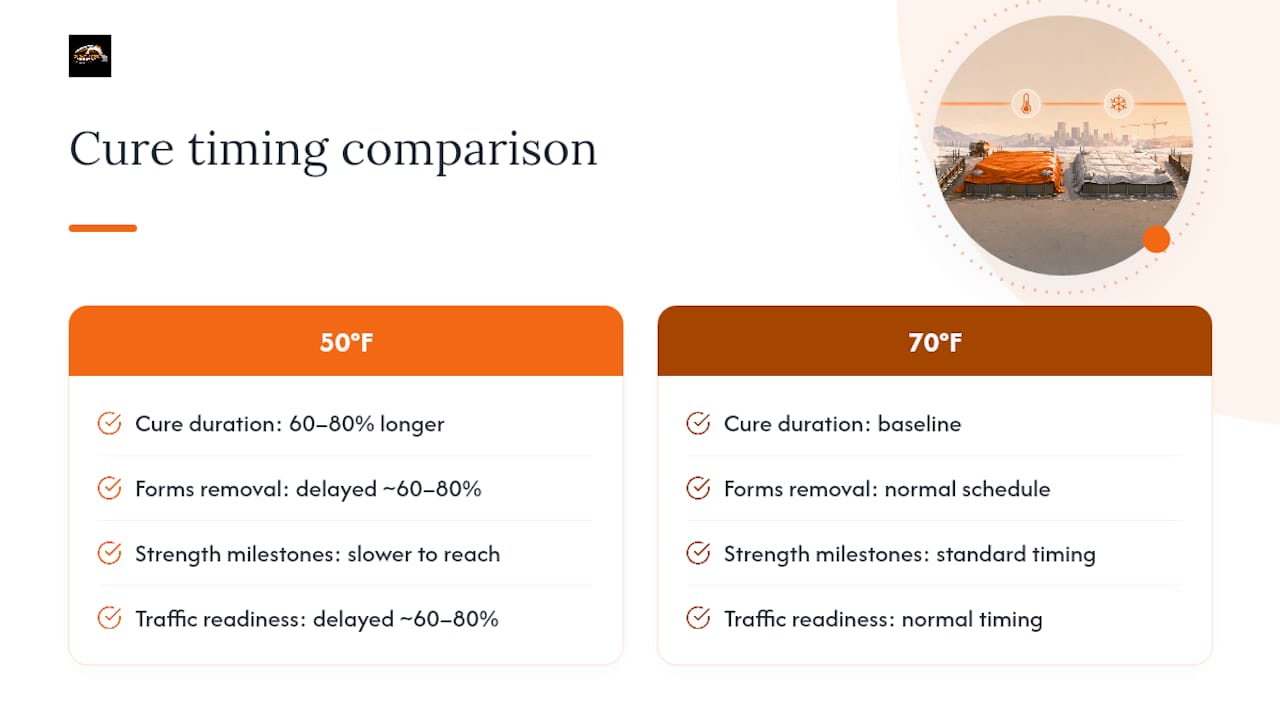
Beyond materials, budget for the time cost. Cold weather concrete curing time runs longer than a comparable warm-weather pour. At around 50°F, many mixes need roughly 60% to 80% longer to cure than the same mix at 70°F, which pushes back when forms come off, when the driveway can handle vehicle traffic, and when the next phase of a project can start.
Temperature monitoring equipment and verification testing add a smaller but real cost. Maturity sensors and testing services aren’t free, but they’re cheap insurance against the alternative: a slab that fails inspection or cracks the following spring, forcing a costly repour plus the original protection expense, twice.
For homeowners budgeting a winter project, the honest conversation is upfront: a driveway or patio poured in January will typically cost more and take longer to cure than the identical job poured in June, and that’s the trade-off for building on a timeline rather than waiting for spring.
How GC Signature Outdoors Handles Winter Pours
Every cold-weather job starts with pre-pour planning: confirming subgrade is fully thawed, ordering warmed materials from the plant, and setting up temperature logging before the truck arrives. We track in-place readings through the full protection window and confirm strength with maturity testing rather than guessing from the calendar.
We also set realistic timelines with clients upfront, since a winter driveway or patio simply cures on a different schedule than a summer one, and we document that process every step of the way.
Ready for a Winter-Ready Concrete Pour?
Most homeowners assume concrete projects have to wait until spring. They don’t, if the crew pouring it actually manages the cold instead of hoping it warms up. GC Signature Outdoors LLC runs winter driveway and patio pours with insulating blankets, heated enclosures when conditions call for it, and logged in-place temperature monitoring backed by maturity testing, the same verification standard covered throughout this guide.

If you’ve got a driveway, patio, or outdoor living space you’ve been putting off because of the season, that timeline is more flexible than most people think; consider professional paver installation in Tucson for your next outdoor project. We’ll walk the site, check subgrade conditions, and lay out a realistic schedule for a properly protected pour. Request a site evaluation through our concrete driveway and patio services page and get a plan built around your property, not a generic weather forecast.
Sources
- 306R-16: Guide to Cold Weather Concreting
- CEMSTONE — Cold Weather Concrete (industry guidance)
- Concrete curing time chart
FAQ
How cold is too cold for concrete to cure?
Below 40°F average daily temperature, hydration slows enough that ACI classifies it as cold weather requiring active protection; below 32°F, unprotected concrete risks freezing before it gains adequate strength.
What happens if it rains while concrete is curing?
Standing water on fresh concrete during cold weather can freeze and damage the surface, so remove water immediately and cover with a dry, waterproof layer, then inspect for washout once conditions stabilize.
How long does concrete take to cure at 40 degrees?
At temperatures near 40°F, cure time extends well beyond warm-weather norms, and active heating is typically required to reach the 500 psi threshold within a reasonable protection period.
How long does it take concrete to cure in 70 degree weather?
Recommended
- Concrete Control Joints: Code Standards and Best Practices | GC Signature Outdoors
- Pavers vs Concrete Patio: 2026 Guide for Kansas City Homes | GC Signature Outdoors
- Concrete Driveways & Patios in Smithville, Platte City & Kearney, MO | GC Signature Outdoors
- Concrete Driveway Cost in Kansas City: 2026 Guide | GC Signature Outdoors
Ready to get started in Kansas City's Northland?
GC Signature Outdoors serves Smithville, Platte City, Kearney, Liberty, and surrounding areas.