
Landscape Lighting Placement: A Practical Homeowner's Guide
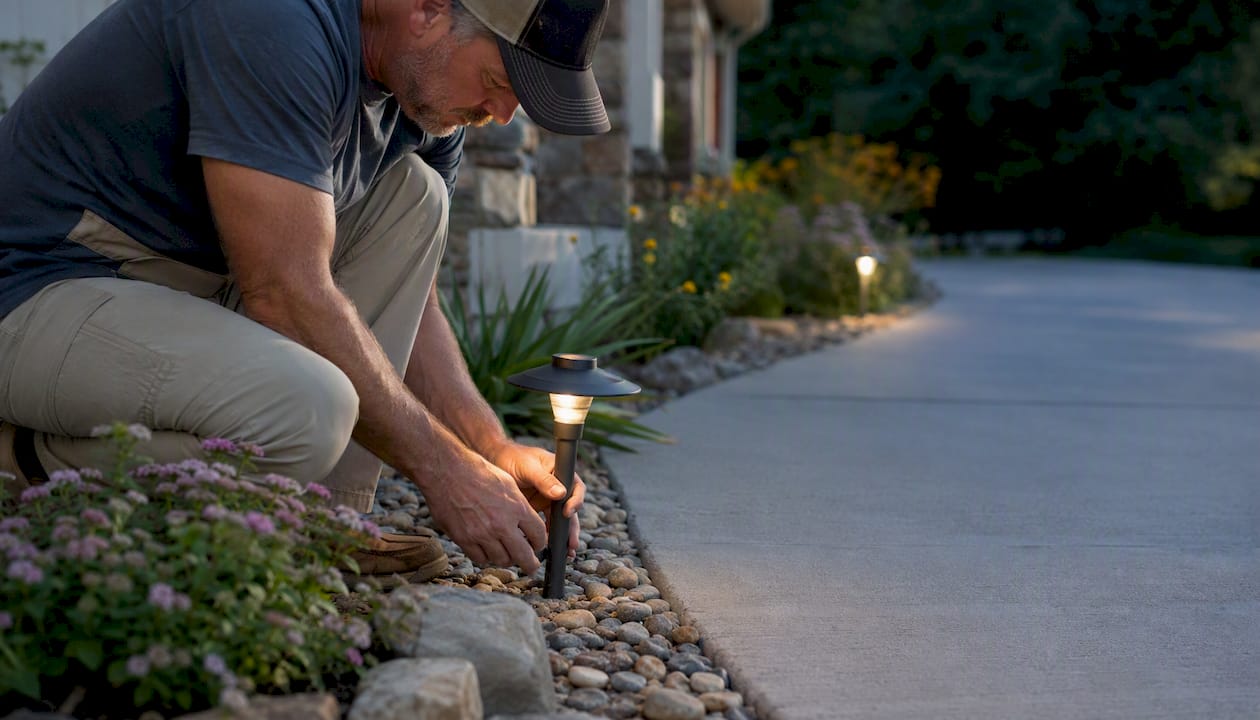
Landscape Lighting Placement: A Practical Homeowner’s Guide
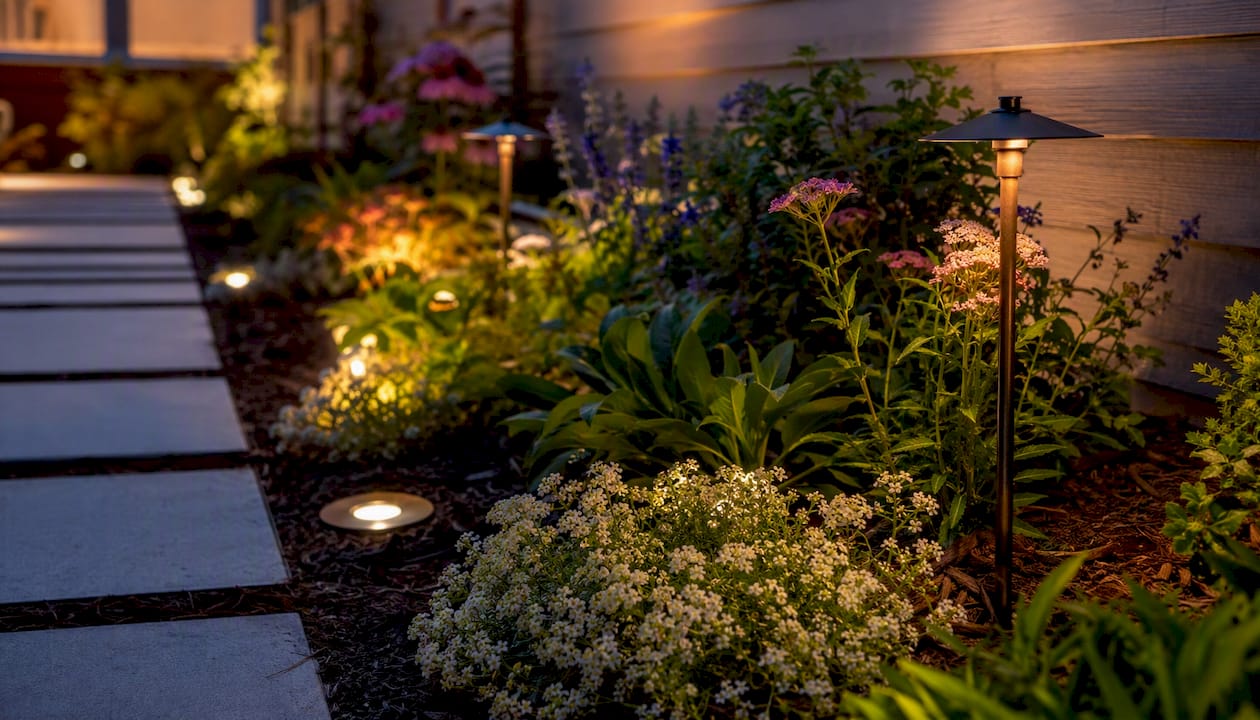
Good landscape lighting placement follows one rule above everything else: hide the fixture, reveal the effect. Position each light so the source disappears into a shrub, stake, or ground sleeve, and the beam lands squarely on what you want people to see. Get that right, and every other decision — spacing, angle, fixture type — falls into place.
Quick placement rules to follow before you buy a single fixture:
- Place path lights 6–8 feet apart in a staggered pattern, not a straight row
- Keep uplights 1–3 feet from small trees and 3–6 feet from large ones
- Aim fixtures at the target, not at the sky or at eye level
- Layer three zones: structure (house facade), paths, and accent features
- Test every fixture position at night before burying any wire
Walk your yard at night with a flashlight and check these:
- Can you see the bulb directly from the driveway, porch, or street? If yes, reposition.
- Does each path light pool overlap slightly with the next? If not, widen spacing.
- Is the house facade lit from below with no hot spots or dark gaps? Adjust distance.
- Are any fixtures aimed at a neighbor’s windows or the street? Redirect downward.
- Do all zones read together as a cohesive scene, or does one area overpower the rest?
Pro Tip: Walk the yard from five different sightlines — driveway, front door, living room window, side gate, and the street — before you commit to any fixture location. What looks perfect from one angle can be blinding from another.
Key Takeaways
Effective landscape lighting placement hides every fixture, layers path, facade, and accent zones, and tests every position at night before any wire goes underground.
| Point | Details |
|---|---|
| Hide the source | Position fixtures so the bulb is concealed; the beam, not the hardware, should be visible. |
| Path light spacing | Stagger lights 6–8 feet apart on standard walks; tighten to 4–6 ft on curves and steps. |
| Distance and beam angle | Match beam spread to fixture distance: narrow beams need more throw, wide beams sit closer. |
| Test before burying | Run all wire above ground and walk five sightlines at night before any final burial. |
| GC Signature Outdoors LLC | Provides full design, installation, and night-testing for KC Northland homeowners. |
Table of Contents
- What landscape lighting placement techniques should you use?
- How should you space path and walkway lights?
- How far from the target should you place each fixture?
- What you need to know about transformer placement and wiring
- Common landscape lighting mistakes and how to fix them
- How to mock up and test your lighting layout at night
- Color temperature, fixture specs, and responsible lighting
- How smart controls improve your lighting placement decisions
- What GC Signature Outdoors LLC has learned about placement
- Ready for professional landscape lighting in the KC Northland?
- Sources
- FAQ
What landscape lighting placement techniques should you use?
Professional designers start with the structure — the house facade — as the largest visual anchor, then layer path and accent lights outward. That sequence keeps the whole yard coherent instead of a collection of random bright spots.
Each technique below serves a different visual goal. Matching the right one to the right target is where placement decisions actually begin.
- Uplighting: Place fixtures at ground level aimed upward at trees, columns, or architectural features. The upward beam creates drama and height. For small trees, stake the light 1–3 feet from the trunk. For large specimen trees, use two or three fixtures placed 3–6 feet out to wrap the canopy evenly.
- Silhouetting: Position a fixture behind a plant or sculpture, aimed at a flat wall or fence. The subject goes dark against a lit background. Works best with plants that have interesting shapes — ornamental grasses, Japanese maples, agave.
- Shadowing: Opposite of silhouetting. Place the light in front of the subject, aimed at the wall behind it. The plant casts its shadow onto the wall, creating movement when wind hits the foliage.
- Grazing: Mount fixtures 6–12 inches from a textured surface — stone walls, brick facades, rough wood — and aim nearly parallel to the surface. The raking light pulls out every ridge and groove. This technique fails if you move the fixture more than 18 inches away; the texture flattens out.
- Washing: Place fixtures 2–3 feet from a smooth wall or hedge and aim straight at it. The goal is even, soft illumination rather than texture. Wide-beam fixtures (60°+) work best here.
- Downlighting / Moonlighting: Mount fixtures 15–25 feet high in a tree or on an eave, angled 45–60° downward. The result mimics soft natural moonlight and casts attractive shadow patterns across patios and lawns. Wide beams at this height cover large areas without harsh spots.
- Path and in-grade lighting: Low-profile stake lights or flush in-ground fixtures illuminate the walking surface. In-grade fixtures work well in driveways and hardscape where stakes would be a trip hazard.
- Pool and water lighting: Submersible fixtures placed at the pool wall, aimed across the water, create a glow from within. Edge lighting with low-profile fixtures at the coping highlights the water line.
Pro Tip: For any uplight, choose a beam spread that matches the canopy width at the distance you’re placing the fixture. A 15° narrow spot from 2 feet away creates a hot column of light; a 36° medium flood from the same distance covers the whole lower trunk. When in doubt, go wider and pull the fixture back slightly.
How should you space path and walkway lights?
Spacing is where most homeowners get into trouble. The instinct is to line lights up in two straight rows like a runway, spaced as tightly as possible. That approach creates glare, kills any sense of depth, and makes a residential walkway look like an airport taxiway.
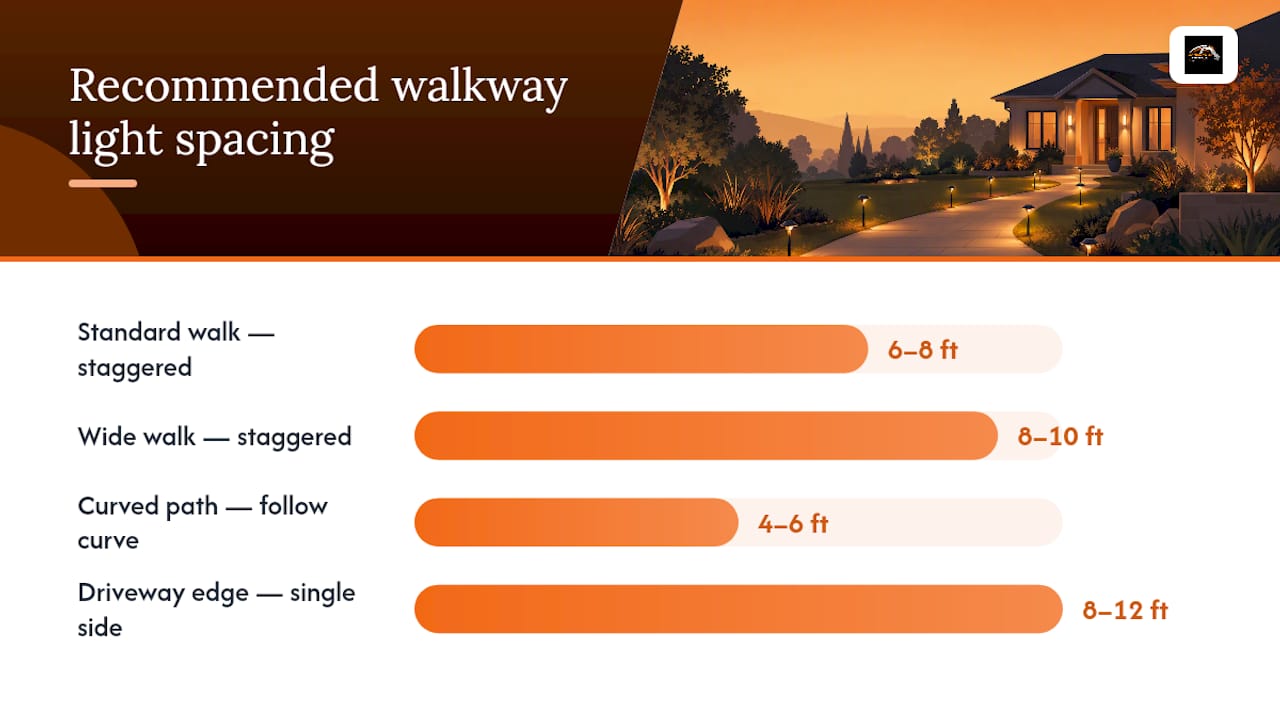
Path lights spaced about 6–8 feet apart work well on standard walkways. Wider paths or fixtures with lower lumen output may need spacing tightened to 4–6 feet. The goal is overlapping pools of light, not isolated bright spots with dark gaps between them.
| Walkway Type | Recommended Spacing | Layout Pattern | Notes |
|---|---|---|---|
| Standard 3–4 ft walk | 6–8 ft apart | Staggered, alternating sides | Avoids runway look |
| Wide 5–6 ft walk | 8–10 ft apart | Staggered or single-side | Use higher-lumen fixtures |
| Curved path | 4–6 ft apart at curves | Follow the curve, not a straight line | Tighten at bends for safety |
| Steps / stairs | One fixture per 2–3 risers | Side-mounted or riser-mounted | Illuminate tread, not face |
| Driveway edge | 8–12 ft apart | Single side or alternating | Low bollards or downlights from eaves |
Step and stair placement deserves its own note. Side-mounted fixtures at stair landings illuminate the tread without shining into the eyes of someone walking up. Riser-mounted strip lights work on modern hardscape but require waterproof-rated fixtures and a clean installation to avoid a cheap look.
What to avoid on walkways:
- Two straight parallel rows at equal spacing (the runway effect)
- Fixtures placed so close together that pools of light merge into one flat wash
- Bollard-style lights taller than 18 inches on a narrow path — they aim light at eye level
- Skipping the staggered pattern on a straight walk — even a slight offset reads as intentional
The fix for a runway look: Pull every other fixture from one side and reposition it 3–4 feet offset on the opposite side. You get the same coverage with half the fixtures and a far more natural result.
How far from the target should you place each fixture?
Distance and beam angle work together. A narrow beam needs more distance between the fixture and the target to spread enough light; a wide beam needs to sit closer or it washes out before reaching the surface. Getting one right while ignoring the other produces hot spots, dark edges, or flat, overexposed surfaces.
Distance rules by target type:
- House facade (uplighting): Start 1–2 feet from the foundation, aimed 45–60° upward. Move the fixture farther out as the wall height increases.
- Wall grazing: 6–12 inches from the surface, aimed nearly parallel. Any farther and the texture disappears.
- Small tree (under 15 ft): 1–3 feet from the trunk, 15°–36° beam spread.
- Large tree (over 25 ft): 3–6 feet from the trunk, 36°–60° beam spread; use two or three fixtures to wrap the canopy.
- Column or pillar: 6–12 inches from the base, narrow spot (15°–25°) aimed straight up.
- Statue or sculpture: 1–2 feet away, 25°–36° beam, angled slightly off-center to create shadow depth.
- Smooth wall wash: 2–3 feet from the wall, 60°+ wide flood.
| Target | Fixture Distance | Beam Angle | Mounting |
|---|---|---|---|
| House facade | 1–2 ft from foundation | 45–60° upward | Ground stake or well light |
| Textured wall (grazing) | 6–12 in from surface | Nearly parallel | Ground stake |
| Small tree | 1–3 ft from trunk | 15°–36° | Ground stake |
| Large tree | 3–6 ft from trunk | 36°–60° | Ground stake (multiple) |
| Moonlighting | 15–25 ft high in tree | 45–60° downward | Tree-mounted bracket |
| Statue / sculpture | 1–2 ft away | 25°–36° | Adjustable stake |
Fixture mounting height matters most for downlighting. In-ground well lights sit flush with the soil and work well for uplighting trees and facades where a stake would be mowed over. Stake lights are the easiest to reposition during testing. Tree-mounted brackets for moonlighting should be installed by someone comfortable working at height with proper equipment.
What you need to know about transformer placement and wiring
The transformer is the hub of a low-voltage landscape lighting system, and where you put it shapes everything downstream. Mount it near a GFCI-protected outdoor outlet in an accessible location — a garage wall, a fence post near the house, or a dedicated outdoor enclosure. Central placement relative to your fixture runs keeps wire lengths shorter and voltage drop manageable.
Key wiring and transformer rules:
- Place the transformer within 10 feet of a GFCI outlet; never run an extension cord as a permanent solution
- Use 12-gauge wire for runs over 100 feet; 16-gauge is fine for shorter runs with fewer fixtures
- Keep total wire run length under 150 feet per zone when possible to avoid voltage drop dimming
- Connect the heaviest-draw fixtures (brightest, farthest) to their own zone on the transformer
- Label each zone on the transformer so troubleshooting later takes minutes, not an afternoon
Voltage drop is the most common reason a lighting system looks great near the transformer and dim at the far end of the run. The fix is either a heavier gauge wire, a shorter run, or splitting the run into two zones. Never daisy-chain more fixtures onto a run that already shows dimming at the last fixture.
Safety checkpoints before burying anything:
- Confirm the outlet is GFCI-protected and rated for outdoor use
- Check local code for burial depth requirements (typically 6 inches for low-voltage wire, but verify with your municipality)
- For any work involving the main electrical panel or new outlet installation, hire a licensed electrician
- Test every connection above ground before covering with soil or mulch
Pro Tip: Run your wire in a loose S-curve rather than a straight line when burying. Plants shift, edging happens, and a little slack in the wire prevents a pulled connection two years from now.
Common landscape lighting mistakes and how to fix them
| Mistake | Root Cause | Fix |
|---|---|---|
| Runway path lights | Two straight rows, equal spacing | Stagger fixtures, alternate sides, 6–8 ft apart |
| Glare at eye level | Fixture aimed too high or bulb exposed | Lower fixture, add shield, redirect beam downward |
| Hot spots on walls | Fixture too close, beam too narrow | Move fixture back 12–18 in or switch to wider beam |
| Dark gaps between path lights | Spacing too wide for lumen output | Tighten spacing or upgrade to higher-lumen fixtures |
| Flat, washed-out facade | Fixture too far from wall, beam too wide | Move closer, switch to 25°–36° beam |
| Visible bulb from street | No shielding, wrong fixture angle | Reposition behind plant or hardscape, add shroud |
| Dim fixtures at end of run | Voltage drop from long wire run | Shorten run, upgrade to 12-gauge wire, or split zone |
Most of these problems show up immediately during a night test — which is exactly why you should never bury wire before testing. Skipping the nighttime test before final burial is the single most expensive mistake homeowners make. Rework after burial costs far more in time and effort than a single evening of repositioning stakes.
Quick-fix checklist for a night test:
- Walk every sightline and note any fixture where you can see the bulb directly
- Check each path light pool for dark gaps or merged-together flat washes
- Look at the facade from the street — is the light even, or are there bright columns and dark sections?
- Confirm no fixture is aimed at a neighbor’s property or toward the street
- Check the last fixture on each wire run for dimming compared to the first
How to mock up and test your lighting layout at night
Testing before burial is not optional. It is the difference between a system you love and one you tolerate.
- Set up temporary stakes at every planned fixture location during daylight. Use small flags or bamboo stakes to mark positions, measuring distances from walls, trees, and path edges with a tape measure.
- Connect fixtures temporarily using above-ground wire runs. Low-voltage systems allow this safely — lay wire on the surface, connect to the transformer, and power up.
- Wait until full dark (at least 30 minutes after sunset) before evaluating. Twilight fools you; true dark reveals every gap, hot spot, and glare source.
- Walk all five sightlines: driveway approach, front door, living room window, side yard, and the street. Take notes or photos from each position.
- Adjust beam direction by rotating or tilting the fixture head. Most stake lights allow 30°–45° of tilt adjustment without moving the stake.
- Reposition stakes where the pool of light misses the target or creates unwanted glare. Move in 6-inch increments and recheck.
- Live with the test layout for two or three nights before burying anything. You will notice things on night three that you missed on night one — a shadow that bothers you, a dark corner you forgot, a fixture that catches your eye from the bedroom window.
Pro Tip: Start with fewer fixtures than you think you need. Light five or six key spots, live with them for a week, then add. Homeowners who install everything at once almost always end up over-lit and have to remove fixtures — which means pulling buried wire.
Color temperature, fixture specs, and responsible lighting
Color temperature is one of the most overlooked decisions in outdoor lighting. Warm white LEDs in the 2700K–3000K range create a cozy, interior-like glow that reads as inviting rather than institutional. Anything above 4000K starts to look like a parking lot, and neighbors notice.
Dark Sky principles give a clear framework for responsible placement: point fixtures downward, use full-cutoff or shielded housings, choose warm color temperatures, and use the minimum light level that achieves the goal. These are not just good-neighbor rules — they reduce wasted energy and extend fixture life by keeping lumen output purposeful rather than excessive.
Fixture spec checklist:
- Choose LEDs rated 2700K–3000K for all residential landscape applications
- Look for IP65 or higher ratings on any in-grade or near-water fixture
- Specify full-cutoff or shielded fixtures wherever the light source could be seen directly
- Use fixtures with adjustable beam heads so you can redirect without replacing hardware
- Brass, copper, or quality powder-coated aluminum housings outlast cheap plastic in freeze-thaw climates like the KC Northland
A note on local regulations: Many municipalities and HOAs have outdoor lighting ordinances covering maximum lumen output, fixture height, and light trespass. Check with your local planning department before installing fixtures near property lines or on structures. The Illuminating Engineering Society (IES) publishes technical standards for exterior lighting that contractors and designers reference for photometric planning and glare control.
Pro Tip: *If a neighbor can see your fixture from their property, it is probably causing light trespass, regardless of how bright it is.
How smart controls improve your lighting placement decisions
Smart lighting controls do not change where you place fixtures, but they change how those placements perform over time. A system wired to a smart transformer or smart controller lets you adjust zones, schedules, and brightness levels from a phone app without touching a single fixture.
The practical placement benefit: you can run different zones at different brightness levels. That kind of zoning is only possible if you planned your wire runs as separate zones from the start, which is another reason to map your transformer connections before burying anything.
Wi-Fi-enabled transformers from brands like Kichler and VOLT Lighting integrate with Amazon Alexa, Google Home, and Apple HomeKit. Lutron’s Caseta system extends to outdoor low-voltage applications for homeowners who already use it indoors. These systems also log runtime hours, which helps you track when fixtures need relamping or when a zone is drawing more current than expected.
The one placement rule smart controls reinforce: group fixtures by use-case into zones, not just by proximity. A path zone, a facade zone, and an accent zone give you three independent levers. Grouping everything on one run because it was easier to wire saves 20 minutes during installation and costs you flexibility for the next decade.
What GC Signature Outdoors LLC has learned about placement
The most common thing we see when reviewing a homeowner’s existing lighting is fixtures placed during the day and never adjusted at night. Someone measured 8 feet from the door, pushed in a stake, and called it done. The result is a light aimed at the mulch instead of the shrub, a facade with one bright column and two dark sections, and path lights that create more glare than guidance.
Our placement philosophy at GC Signature Outdoors LLC comes down to three commitments. First, hide the source. If you can see the bulb, the fixture is in the wrong position or needs a shroud. Second, stage at night. We do not finalize any fixture location until we have walked the property after dark from every angle a visitor or the homeowner would use. Third, plan for growth. A shrub that hides a fixture perfectly today may swallow it in two years, or a tree canopy may close over a moonlighting mount. We account for mature plant sizes in every landscape design we produce, and lighting placement follows the same logic.
Homeowners who want to DIY this process can absolutely use the placement rules in this guide. The checklist, spacing tables, and beam-angle guidance are the same framework we use on professional installs. The difference is that a professional brings calibrated fixtures, a voltage meter, and the experience to catch problems before they become buried wire. Either way, the placement plan you build from this guide is one you can hand to any contractor and have them execute without guesswork.
Ready for professional landscape lighting in the KC Northland?
Placing lights well takes time, a good eye, and at least one full night of testing. GC Signature Outdoors LLC handles the entire process for homeowners in Smithville, Platte City, Kearney, and the surrounding KC Northland area, from the initial walkthrough to final fixture burial and transformer programming.

Our outdoor living and lighting installations include integrated lighting for patios, fire pit areas, stone seating, and walkways, designed so every fixture is hidden, every beam is purposeful, and the system is wired for future expansion. We test at night before burying a single wire, confirm GFCI protection and local code compliance, and walk you through the transformer zones before we leave.
Browse the project gallery to see completed installations, or reach out to GC Signature Outdoors LLC to schedule a lighting consultation for your property.
Sources
- Landscape Lighting Design | Vesta Lighting
- Landscape Lighting Placement Mistakes (Fix Path Lights, Glare & Spacing)
- Outdoor Lighting Placement Guide: Professional Distances, Angles, and Techniques for Every Fixture
- Landscape lighting essentials | Fine Homebuilding
- All about landscape lighting | This Old House
- The Illuminating Engineering Society (IES)
FAQ
Should landscape lights go in front of or behind plants?
It depends on the technique. For uplighting, place the fixture in front of and below the plant, aimed upward into the canopy. For silhouetting, place it behind the plant aimed at the wall behind it.
What is the general rule of thumb for outdoor lighting?
Hide the fixture, reveal the effect. Position each light so the source is concealed and the beam lands on the intended target, then layer path, facade, and accent zones for depth.
How many feet apart should landscape lighting be?
Path lights work well spaced 6–8 feet apart on standard walkways in a staggered pattern. Tighten spacing to 4–6 feet on curves or steps where safety visibility matters more.
What are the most common outdoor lighting mistakes?
The most frequent problems are runway-style path lights in straight rows, fixtures aimed at eye level causing glare, uplights placed too close to walls creating hot spots, and skipping a night test before burying wire.
What color temperature works best for residential landscape lighting?
Warm white LEDs rated 2700K–3000K are the standard recommendation for residential landscapes. They read as warm and inviting rather than harsh, and they align with Dark Sky guidelines for minimizing light pollution.
Recommended
Ready to get started in Kansas City's Northland?
GC Signature Outdoors serves Smithville, Platte City, Kearney, Liberty, and surrounding areas.